Category Archives: Copics

Coloring My Monthly Hero

IMG_0231_lori-craig-mymonthlyhero-full
MMH-300x359
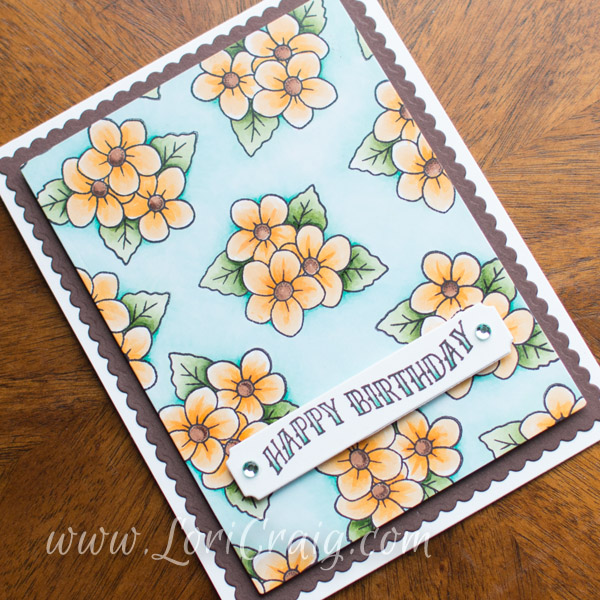
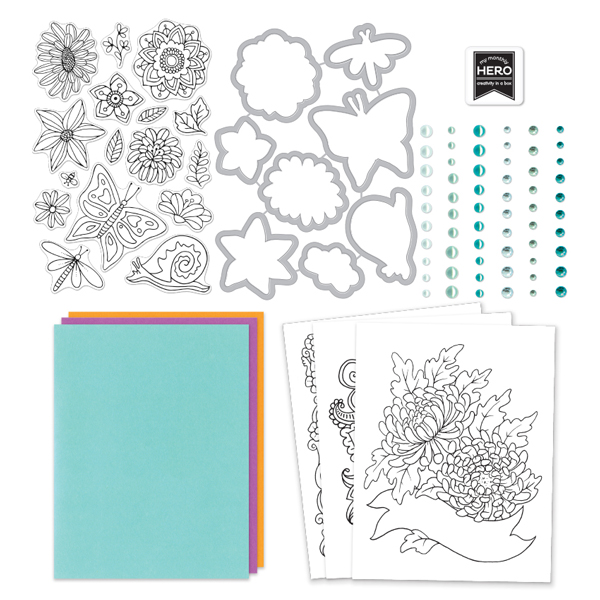
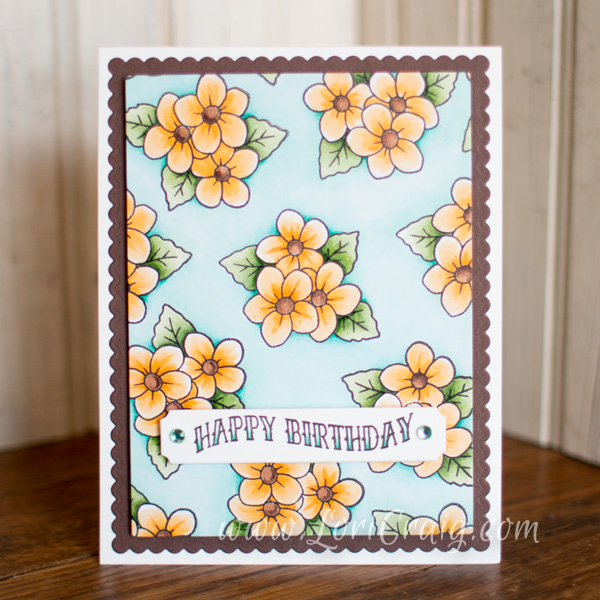
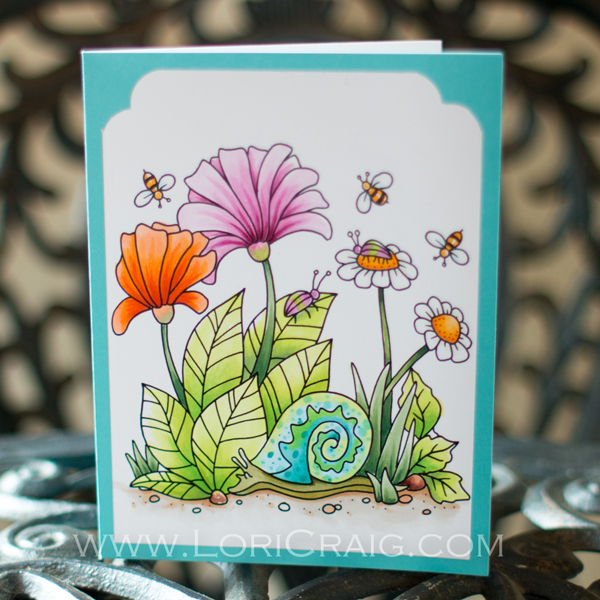
I’ve had this fun image from the  printed image pack included in the Hero Arts March My Monthly Hero kit colored on my desk for several days. The images in the kit come pre-printed on XPress It Blending Card. Marianne’ Flower stamps, pre-prints, dies and a beautiful Copic friendly ink are also included.  This has been such a great kit to work with!

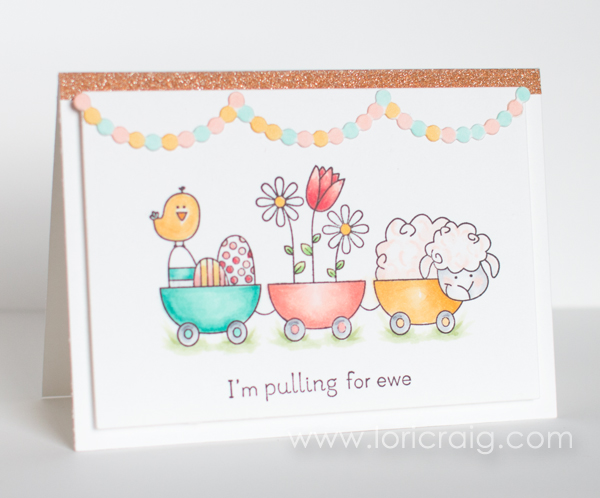
I actually wanted to share this card last week, but I was stumped for color choices of this snail. Snails aren’t in my normal arsenal of images to color, but this one is cute, and I loved the flowers!

FullSizeRender (1) So I pulled a trick from my image coloring playbook and did a quick google search for “snail images“. This cute blue and green snail popped up about half way down the page, and I knew it would be a great color blend with the brightly colored florals and leaves I had already finished!

Don’t be afraid to search images for things that you are coloring! The hints that pop up for colors, shades, shadows, etc. can all be very helpful!

IMG_0231_snail

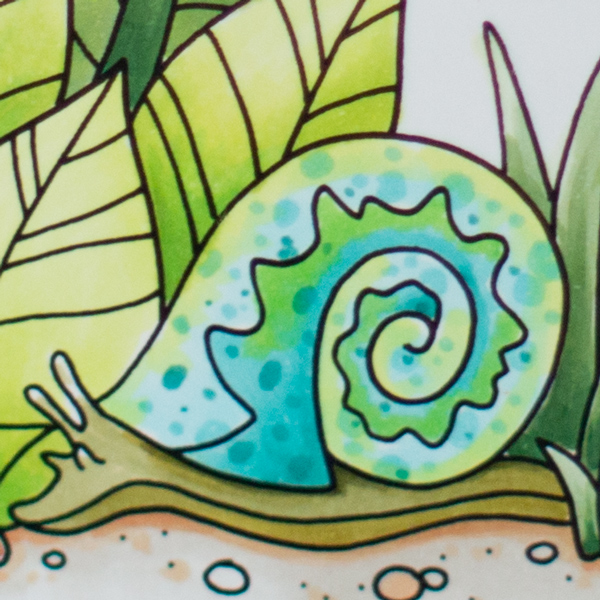
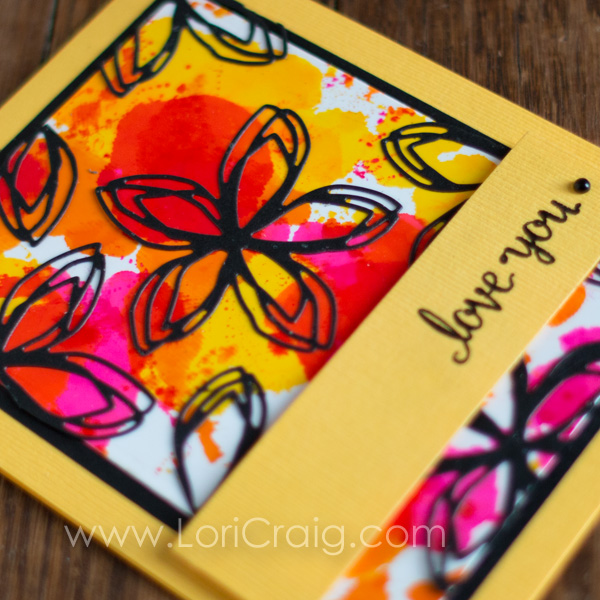
Notice on the blues and greens, I didn’t concern myself with perfect, smooth blends – they weren’t perfectly smooth on my reference photo, either! I laid the blue and green of the shell color together keeping the edges wet. The dotted blues were added after the base layers dried. The dots and spots when added to the dry layer will retain their circle shape.

IMG_0231-close-up-lori-craig-mymonthlyhero

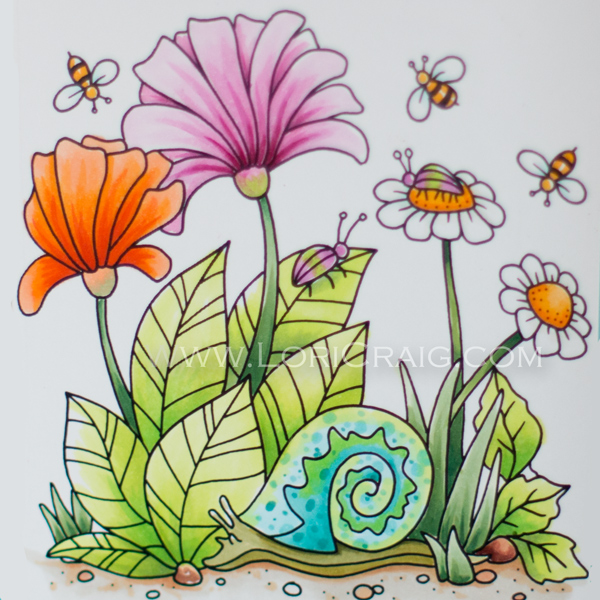
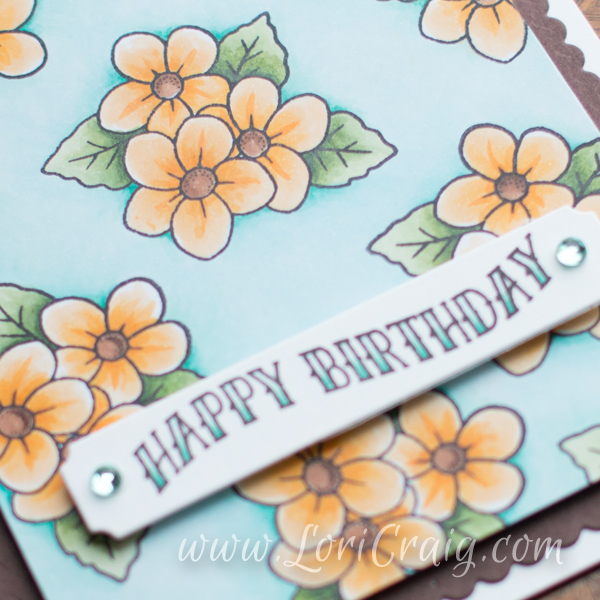
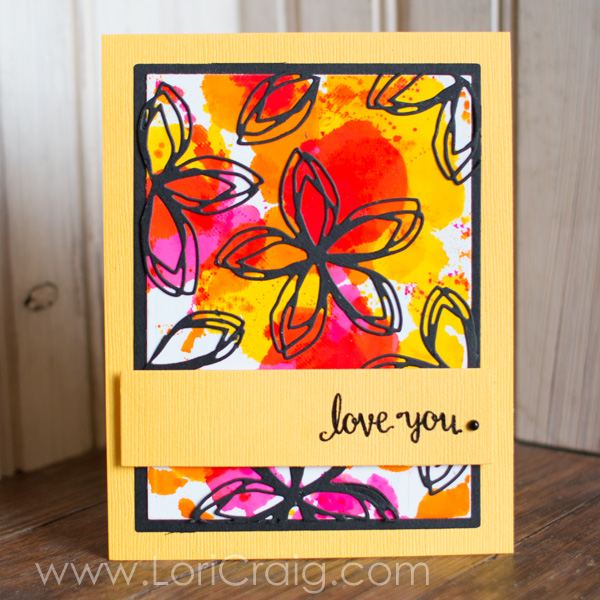
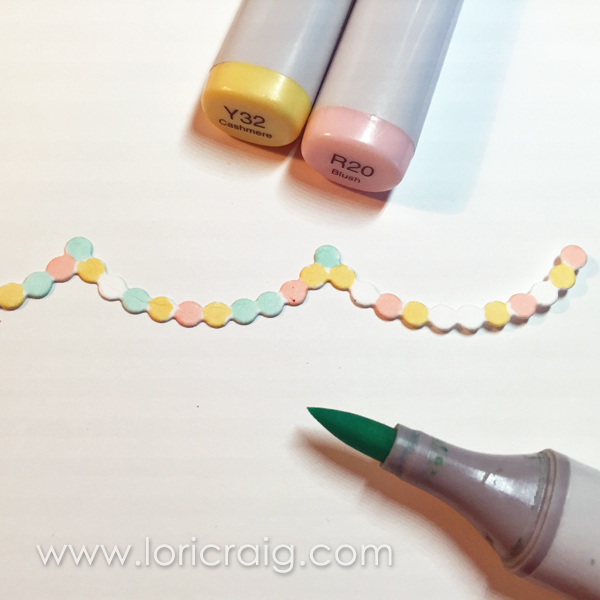
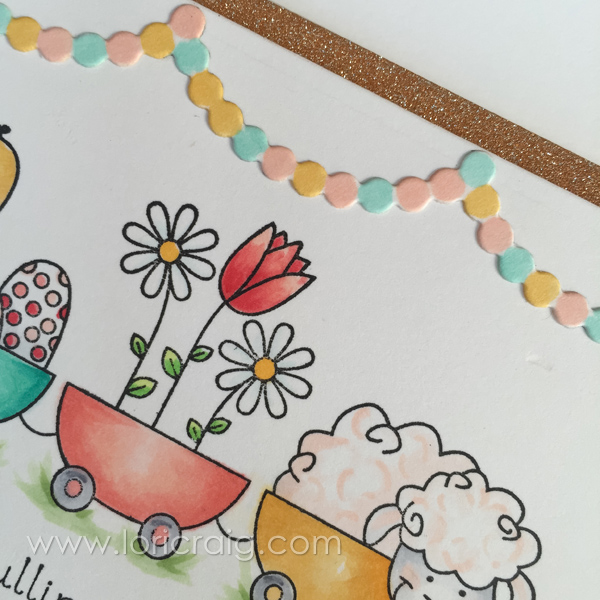
The colors I used here are a combination of:

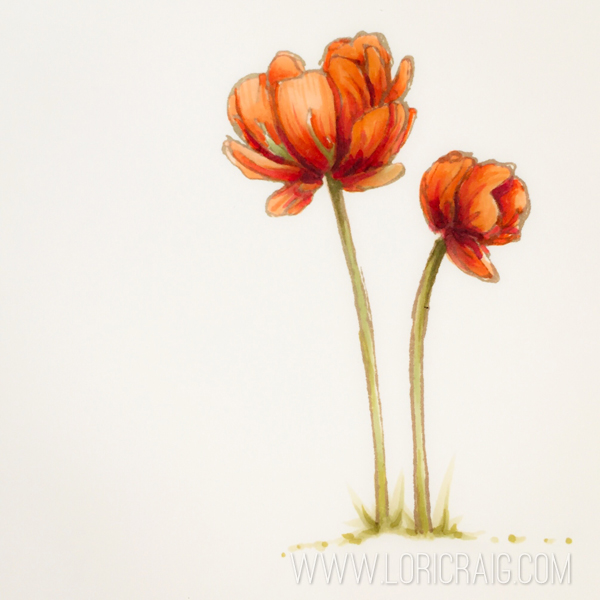
  • orange flower: YR12/YR14/YR18/R27
  • pink flower: RV62/RV66
  • daisies: Y32/Y35
  • big bright leaves: YG01/YG03/YG07
  • tall thin stems: YG61/YG63
  • snail: YG01/YG03/BG53/BG57/YG61
  • misc grays and earthtones for rocks and dirt

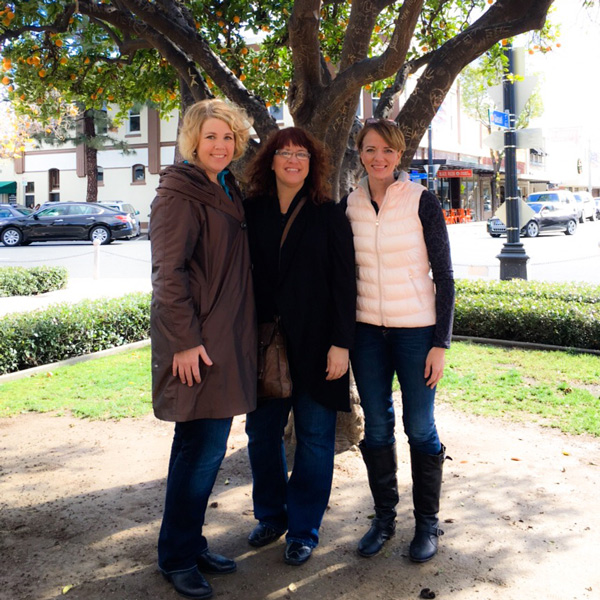
We are finishing up our spring break week, and it has been such a beautiful family week! Here’s a picture for you! image


Thanks for stopping by! Have a a great week!

Hopping with Hero Arts


hero hop lori craig march 2016 B

Happy, happy Monday! I am definitely happy to be sharing something so fun from from my friends at Hero Arts today!

MMH-300x359I’m a fan of their My Monthly Hero monthly card and stamp kits, so I was really excited when I realized that Marianne and the Copic Marker team would be collaborating with them this month!  The kit pairs so well (perfectly!) with the teaching content of our new Copic Flowers Class and Marianne Walker’s Coloring Foundations Book ~ Flowers!


my-monthly-hero-march2016

The March My Monthly Hero kit contains: 12 coloring cards printed on XPressIt paper, coordinating stamps and dies, an Intense Black ink cube (alcohol marker-friendly), extra XPressIt paper, assorted notecards, and a package of gems.

There are three optional add-on for this kit:

 These kits are only available while supplies last (I missed one of my favorites a few months ago because I waited too long to order!). When they are gone, they are GONE. (My Hero Arts friends mean it!)

hero hop lori craig march 2016 C

On the card I’m sharing today, I repeatedly stamped this cute image from the set Marianne’s Flowers over a card front sized piece of XPress It Blending card and then added Happy Birthday from Ribbon Messages. My flowers are colored with Y32, Y35 and Y38. I had done a little caucus on my Instagram last night requesting votes on potential flower centers… In the end, voter turnout was a little soft, and I made an executive decision to color the centers brown with the E20s. (You can follow my Instagram HERE.)

My leaves are colored with G40, G43 and G46. And, the background of my card is colored with BG00, BG11 and BG13.

The trick to coloring the large background is to keep the edges of your ink wet as you work across the design. Wet ink blends better. So, I tend to work in quadrants, completing one at a time and then moving on.

hero hop lori craig march2016

I was teaching this exact class in St. Louis over the weekend, and I’m headed to Seattle, Calgary and Sacramento soon! So if flowers are of interest to you, please check it out here.

I do hope you have a chance to check out the ROCKSTAR ladies on the hop today! They are all beautiful souls, and I’m excited to see their fabulous coloring and fun projects!
Marianne Walker
Marianne Walker
Sharon Harnist
Cindy Lawrence
Lori Craig — you are here
Debbie Olson
Michelle Houghton
Mariana Grigsby
Libby Hickson

I have more to share from this kit tomorrow, so check back!

Thanks for stopping by, and have a wonderful Monday!

love you

various full final lori craig

I had a project that I wanted to share with you today that features Copic Various Ink for vibrant color without coloring!

When I think about Various Ink, my first thought is refillable markers, but used straight from the bottle, the Copic Various Ink is so vibrant… especially on non-porous surfaces, like glossy card stock – used here. I just drip ink refills onto a kraft mat and dab my cardstock into the ink for instant, quick dry, vibrant color, but there are some pointers I can share to help make your efforts eye-popping!

HGTV_Color-Wheel-Full_s4x3.jpg.rend.hgtvcom.1280.960

My first tip for color popping blends is color selection! For combinations that blend well together, select two to three colors that are touching or close to each other on the color wheel. These colors will naturally blend with an eye-please effect. If you choose colors that are directly across from each other (like blue and orange or pink and green), the normal result can be a big mud puddle because colors opposite from each other typically create brown when mixed.

various close lori craig final A

For my card today, I used Copic Various Ink Y08, RV06 and YR04 – yellow, pink and orange. Notice how they are all on the same half of the pie if you slice that color wheel up?

dry-blend-Copic

My next tip is more along the line of know what look you are going for to achieve the desired result, not that either one is right or wrong 100% of the time. 🙂

In the sample above, I dropped ink on the kraft sheet and dipped one color at a time, allowing just a few seconds between colors so that each could set and dry. The dry time is really so, so fast with the Various Ink… This single color at a time method allows for an ink splotch look with distinctive splats of each color.

wet-blend-Copic

In this sample, I dropped all three colors on my kraft mat at the same time and then smooshed my cardstock into the color. The result is a much runnier, more fluid blend of color. I liked this look, too!

Tip: If you don’t have every color of Various Ink that you want to utilize, grab your favorite marker and scribble lightly onto your kraft mat, spritz lightly with blender solution and dip your cardstock.

love you various lori craig final

I accented with die-cut black blooms from Concord & 9th’s new Floral and Flutter die. Love these wispy petals and the dies cut like butter for me. I think I cut about 10 each of the flower and the butterfly, and I didn’t have any rips or half-cuts in the whole bunch!  Finally finished with a ‘love you’ sentiment embossed in black with a simple pearl!

various full final lori craig

Thanks for stopping by today!


Stamping Away Notebooks

notebook stack lori craig

One of the things on my to-do list before I left for my retreat was make a little giftie for all the people attending… I had only met two of the ladies before, so I definitely wanted to show them a little love, and as a list maker… I knew that these kinds of events inspire a lot of lists of things you want to remember, make, see, do or buy. So I created a little journal for all of my new friends.

sensa-square

I am in love with these little SenseBooks that Imagination International started carrying last year. This is the 4″ x 6″ pocket size, and the pages are available ruled, grid or blank. I really like that they have a table of contents and that the pages are numbered (the 4×6 version has 135 pages). You can write or sketch your own little chapters, and they are cheap enough that I can have multiples going at the same time.

You can purchase the notebooks with or without covers, and I wanted something simple and unique, so I created my own covers with a thin, kraft paper. I used a roll of kraft wrapping paper, and ripped each sheet to size using a straight edge – I liked the raw, ripped look. I keep a roll of this on-hand because it’s great for quick gift wrapping, table covering for parties or events and random projects.  You could also use sheets of brown paper bag paper. I don’t recommend traditional cardstock weight for this because you want the jacket to wrap easily around the notebook and lay fairly flat.

screen-shot-notebook-cover-template

For my little gift notebooks, I thought a cute cover would be fun, so I created a jacket template in Photoshop. I used the height of the notebook and allowed width to span the front, back and spin with almost 2″ on each side for an inside flap. On the above picture, I show a pink mock-up of the space where the front cover will end up resting on my jacket so I know where to position my text. I just deleted the pink layers before printing.

I printed my book jackets on the Epson SureColor P600 – which I like because it handles many different media types, thicknesses and paper sizes – it will print directly from rolled paper or canvas. So fun!


notebook stack lori craigI created the Kansas state outline by tracing a free google image in Photoshop. Next, I layered my text over the Kansas image. The text on the cover reads:

My little book of big, big ideas from Stamping Away Kansas. Stamps I need, tools to make my life easier, recipes I want to try, books I want to read, things I want to do. Important stuff to remember. lists of all the pretty, hip, tasty, cool and awesome things.

notebook with pen lori craig

You can see other photos from the weekend here, and I think everyone came home with lists of fun things, a lot of finished cards and projects and memories too numerous for this little book of big ideas.

Thanks for stopping by!

Fresco Leaves

fresca full lori craig

A few weeks ago, my friend Lydia offered a beautiful tutorial in the Weekly Inkling for a beautiful technique called Faux Fresco, and I was in love with the look! I really want to say Fresca – and grab a grapefruit soda from my fridge every time I say that word… I’m not so much of a technique girl, but I knew I had to try it!

fresca colored lori craig

The technique calls for waterproof coloring mediums and embossing folders, so of course, I would choose Copic Marker as my medium. I had this pretty embossing folder in my stash. I think something with a fairly substantial design works best. I loosely colored the raised leaves and branches of the embossed design.

I was really tempted to stop here because I loved the look of the coloring on the raised embossed card stock, but I kept going…

fresca leaves front lori craig

I followed the tutorial instructions with acrylic paint and a sanding block to create the finish. I actually did skip the last suggested step of clear embossing because I loved the matte finish revealed on my leaves after the sanding step.

fresca leaves close lori craig

The leaf panel is so soft… It has almost a vellum look to it. I added a layer of greet glitter Deco Tape to the edge of my panel.

fresca full lori craig

And a sentiment from Wplus9 to finish off my simple card front. Do you have any embossing folders that would work well for this technique? Would love to see!

I’m just home from a fun craft retreat, and I have lots to share this week. Hope your Monday is off to a beautiful start!

Pulling for Ewe

pulling for ewe Lori Craig

I’ve been coloring, coloring… This is another card I colored for Kathy Racoosin’s 30-day marker challenge. I’m a day or two behind, but still making progress. I have a long swim meet to sit through enjoy this weekend, so I think I’ll be caught up by Monday.

This image is from the Taylored Expressions set Hello Spring! So fun… My main Copic colors are R20/R22, Y32/Y35 and BG11/BG13. Simple and springy.

pulling for ewe

To make my little bullion fringe bunting, I used the Skinny Mini Party Banners from Taylored Expressions, cut from white and simply dotted lightly with Copic Marker.  Just a squish dot with the pen nib. So easy…
pulling for ewe close lori craig

I colored my sheep with gradually darker shades of my lightest pinks – just gently adding in some fluffy swirls. Finally, I added a little Gold Glitter Deco Tape from XPress It to the top of my card to finish it off.

pulling for ewe Lori Craig

If you are in the Seattle area, my April 8 & 9 Standard and Intermediate Certifications along with the brand new Coloring Flowers class were opened for enrollment this week. The feedback on the flowers class has been GREAT! It’s a shorter evening class, so I hope it might work for some of our Copic friends who have a hard time attending full day classes.  You can find all of that info and sign up links HERE.

I better go pack my swim bag and find my lawn chair for the weekend! Be back soon!  Thanks for stopping by!

a life she loved

DM 01 Lori Craig

I’ve been getting ready for a new year of coloring and Copic classes. My friend Kathy Racoosin is hosting a 30-day color challenge, and I felt like there was nothing better to prep for my classes in St. Louis the first weekend in March! If you are in the St. Louis area, come see me!

This is a Taylored Expressions image from the set When Your Heart Speaks. Love.

DM 02 Lori Craig

This is an image that was in a faces and hair class that Copic offered several years ago, and I thought she’d be a great sample in my class portfolio. I colored this for day 2. Braided hair is so fun! Her hair is done with the E30 Copic family. The darker skin complexions are a bit of a challenge for me, and I know practice is the only way I’ll get better – here I used E01 (because I can’t find my E11!!) E13 and E15 for her skin.

DM 03 Lori Craig

This was for day 3. I used a loved stamped set from Taylored Expressions called A Life She Loved. I may end up coloring one more from this set and framing a little tryptic for my crafty office. Coloring glass is something we tackle in our Clothing and Accessories Copic Class.

DM 05 Lori Craig

This little lady from MFT Stamps has been inked on my desk for a few years. I colored her yesterday morning for Day 5. Such a cutie! Her hair is also colored with the E30s family, but her skin is much lighter complexion. I’ve used E51, E21 and E000 (my secret weapon Copic facial concealer!)

DM 06 Lori Craig

My parents are visiting this weekend, but I got up this morning and colored this poppy image from Stampin’ Up! before we get busy with some errands and hanging out… I love a Saturday when I’m busy hanging out! Don’t you!? Coloring Flowers with Copic is a new class that we are offering this year, and I’m looking forward to teaching that in St. Louis, as well!

We’ll see how I hold up on the 30-day challenge. You can find a lot of Copic inspiration using the Instagram #thedailymarker30day! If you aren’t going to be in St. Louis, you can see our full year’s schedule of Copic classes on this page. I hope our paths will cross at some point soon.

I also hope you have a fabulous Saturday…hanging out or otherwise!

Thanks for stopping by!

Whatever You Are…

kirarina tag

I love the idea and the look of hand-lettering on projects, and I’ve been practicing in the car, volleyball games, at night in front of the tv… I’ll keep practicing.

Last weekend, I was playing around with the Kirarina Wink pens from Imagination International, because they write on glass, acetate and plastic…lightbulb. So, even though acetate doesn’t photograph very well, I thought I’d share this project for a slightly different take on “stamping” and “hand-lettering” for a more  hand-crafted look.
FullSizeRender (25)First, I stamped my butterflies (from my favorite Sparkly Dreams from Verve) in a row with the MINI MISTI. I know there are a lot of toys that get oohs and aahs in our craft, but I am serious when I say I love using the MISTI.  I can re-stamp for crisp impressions every, single time – with perfect alignment. I’m not trying to sound overly dramatic, but it really has renewed my enjoyment of stamping!

Mini-MISTI-comparison What I’m using is the MINI MISTI that was shown at the Craft Hobby Trade show earlier this month. It is perfect for people like me who have trouble finding the top of their desk because of all the creative expression piled on top! 🙂 Here you can do a little size comparison. I put a little piece of washi tape on my corner to use as a lifter when I’m opening and folding the MISTI.

FullSizeRender (27)Once my butterflies were stamped, I created a tag from the Verve Flourished Tag set out of acetate, layered it over a sentiment stamped on a post-it note from the same Verve set that I love. And, I basically traced the pretty handcrafted letters onto my acetate with the Kirarina Wink.


Kirarina-Wink1The Kirarina Wink pens come in 18 beautiful colors – including a fabulous white. They have a firm nib, and a beautiful opaque ink with a tad bit of shimmer. For this card, I used the new Emerald, and there is a beautiful new Violet, as well.


kirarina-tag-close

I added a tad bit of stark white glitter behind the clear tag and beautiful crisp Shine Bright sequins from Verve.


kirarina tag

So, basically, the thought I want to leave you with today is… to embrace different aspects of paper crafting, think outside of the box and try new things, and above all… whatever you are… even a tracer!… be a good one! 

Back from CHA and Seasons Givings Winner

I’m back from a great week of Copic Classes and the Craft Hobby Association trade show in Anaheim, California! It was wonderful to see so many paper crafters, as well as the new products coming for the new year!

Thank you all so much for the beautiful comments on the Seasons Givings blog hop! Loved your grateful thoughts to start a new year! My winner is posted below, but I also wanted to share some of my favorite CHA moments…

IMG_6544

I didn’t take too many photos, but I have a few… my photos are about the people. Echoing other shares I’ve read this week, there were lots of pretty things to look at on display, but paper crafting people make the experience like no other…

This first photo is from Plaza Square Park in historic Orange, California. A little chilly the day we visited, but beautiful none-the-less.

Tosh-Cindy-MeHere I am with my Copic teammate and friend, Cindy Lawrence and the fabulous Tosha Lyyendekker. We enjoy chatting about all things paper and crafts, but with Tosh in California, Cindy from New Hampshire and myself in the midwest, it’s fun to just chit chat about life in general. Love them!


copic-class-messWhile I was gone, I taught three fun workshops in Anaheim – Coloring Faces and Hair, Vintage Values and Monotone and Coloring Cloths and Accessories. I love teaching these classes, especially seeing a student’s progression through the two days – often students who have never colored with Copic before! Transforming and FUN!


jami-and-cindyAfter two full days of Copic classes for me, it was time to walk the show floor. This is Cindy and one of my longest known paper crafting friends, Jami Sibley in a full size teepee the Spellbinders booth! It’s always great to chit chat about the new finds and brainstorm ways we could envision using so many fun new tools!


lydia-dina-lori And, such a great moment of the show for me was brief but fabulous as the Splitcoaststampers Crew – Dina Kowal – our insanely talented artist in residence, our amazingly fun and organized community manager Lydia Fiedler and myself were all together for about 10 minutes! Love working with such talented women!

I feel rested, revived and inspired after the trade show, and I’m looking forward to a fun new year!

Thanks so much for all of your support and encouragement of myself and your fellow paper crafters. We are a special collective, caring group, and I love that!

For my Seasons Givings hoppers, my winner is Robyn Smith, like so many of you and myself, she was most grateful for her family this year! I’ve emailed Robyn, and I wish each of you a beautiful, beautiful new year!

Felt and Ribbon Rainbow Bookmark

Hot-Ribbon-Final-Close-LoriCraig

Happy New Year’s Eve today! I hope you had a beautiful Christmas and holiday season with friends and family! I know that we sure did.

My oldest daughter had asked for a study Bible for Christmas, and earlier this week when we were studying together she mentioned needing a bookmark. So, this morning I pulled out some felt and Hot Ribbon to make one for her that would be flat in her book and hopefully hold up a little better than paper. Teenagers aren’t known for gentle ways. LOL

Continue reading