Category Archives: Sweet ‘n Sassy Stamps

Faithful Sunflowers

Sunflowers are pretty faithful, aren’t they? The way they keep their face to the sun…focused on the brightness. That’s what I’m trying to do during this Polar Vortex that’s crippled much of the country… keep my face to the sun… focused on the brightness.

This image from Prim Blessings is a Sweet ‘n Sassy Stamps favorite. The sunflower is stamped with Espresso Truffle ink onto XPress It Blending Card and colored with Copic Marker.

The leaves are a more traditional smooth blend of ink, but the center of the flower was done with a stippling technique for texture rather than a smooth blend that you often see with Copics. The colors are simply dabbled onto the image, lightest color (filling the entire circle of brown) to darkest, just like you see in the close up. No blending required.  The petals are a combo Y32, Y35 and Y38. The center of the sunflower is a reddish brown: E33, E35, E37 and in the outer-most ring, E39.

I have been focused on using up scraps from my basket in the past week or so, and I honestly can’t tell you the name or manufacturer of the patterned paper. If I were the betting kind, I’d say My Mind’s Eye. I put my card together with a combination of dies from the MFT Blueprints line. For this card I used both Blueprints 3 and 5. A button, some twine and a few ivory sequins made quick work of this one.

Stay warm, and stay faithful. Summer will come again, just not today, my crafty friends.

May the miracle…

I  had a marathon of crafting over the last few days. I’ve been busy with Hope You Can Cling To challenges at Splitcoast. Such a great cause for a card drive, and over $5,000 is up for grabs from some fabulous incredible sponsors, like Sweet ‘n Sassy Stamps – the maker of this image and sentiment, Born This Day.

This card is for Teresa’s Stand Tall challenge. My image is colored with Copics. Add a few fun dies and some Xpress It Double Sided adhesive paper (to cut and glitter the star), this one was easy! This die/stamp combo cut better than anything I’ve ever tried before. I was able to line it up perfectly – easy. I am even considering a batch of these for Christmas, especially since I can have my daughters do a lot of the tag and star die cutting! Other than the manger scene, all of the other dies are Die-namics Blueprints 8 and Traditional Tag STAX Die-namics and Pierced Traditional Tag STAX Die-namics from MFT.

Please check out the challenges. Participate if you can! You’ll have a good time and feel great supporting the MD Anderson Cancer Center!

I’ll be back tomorrow with another fun sample! Can’t wait!

What Sunflowers Do

Keep your face to the sunshine and you cannot see the shadow.
It’s what sunflowers do. ~ Helen Keller

At Splitcoaststampers, we published a Product Focus review for our friends at Ranger this morning. A Product Focus is an in-depth look at a specific product or product line with how-to, photos, videos, links to appropriate tutorials, reviews from fellow paper-crafters and projects to inspire you.

We were specifically looking at Distress Markers this week. How pretty and what fun!

I stamped this sunflower image and sentiment from Prim Blessings (Sweet ‘n Sassy Stamps) on Distress Watercolor Cardstock using Timber Brown StazOn ink. Then I set to coloring with a combination of Wild Honey, Spiced Marmelade, Ripe Persimmon, Gathered Twigs and Barn Door Distress Watercolor Markers. The colors blended very easily on the cardstock with the Detailer Watercolor Brush, and when the first layers were completely dry, I went back over the leaves and sunflower center with my markers to add texture, using both ends of the marker (brush and detail tip) to add dots for added depth.

I only have one brown Distress Marker and the Timber Brown has more of a yellow undertone to it than I preferred for this image. The beauty of watercolor markers is that you can create a palette of two inks and mix a new color right beside your work space. That’s what I’ve done here. Easy.

You can read our full team review here. The ladies really loved working with these markers, and I think they rocked the gallery with beautiful projects.

Have a GREAT Wednesday!

  • Stamps: Prim Blessings – Sweet ‘n Sassy Stamps
  • Ink: Timber Brown StazOn – Tsukineko
  • Cardstock: Distress Watercolor Cardstock – Ranger, Distress Color Kraft Core Cardstock – Core’dinations and Whip Cream Cardstock – My Favorite Things
  • Other: Wild Honey, Spiced Marmelade, Ripe Persimmon, Gathered Twigs and Barn Door Distress Watercolor Markers – Ranger, button, twine, burlap ribbon

Make Life Grand

A quick card to share today with the same set that I showed off yesterday using the direct-to-stamp technique with Ranger Distress Markers. I’ve seriously picked up this set three or four times in the last two weeks for no other reason than I love the poppies and the beautiful sentiments. It’s so easy to work with!

The set is called Celebrate Today from Sweet ‘n Sassy stamps. I bought it after their July release, and I know I’ll use I’ve already used it a lot.

I put this together this morning for Jen’s Deconstructed Sketch.  The papers are from the Collectible collection from My Mind’s Eye. The inks are Party Pink – Clearsnap & Blu Raspberry – MFT. I used a combo of Blueprints 1 & 4 Die-namics from MFT for the layers.

More to share soon. Hope that you have a beautiful Friday!

Thanks for stopping by!

Choose Faith

I put this together for one of the Dare to Get Dirty challenges for our amazing Splitcoaststampers Fan Club members last week hosted by the one and only Lydia.  I think this met her criteria with several of the key components.

I used a new stamp set from Sweet ‘n Sassy Stamps for this project. The silhouette stems and pretty sentiments of this set, Celebrate Today, really spoke to me. I’ve used it several times in the last week alone.

My crinkled ribbon is actually seam binding. If you tie your ribbon and then mist it with a water mister, you can scrunch the ribbon very quickly and it will dry pretty fast, as well, while holding the crinkle shapes.

The poppies were colored with Distress Markers – direct to stamp. First, I colored them with Worn Lipstick and then tapped Fired Brick over the poppy blossoms. Easy. Peasy. I love that look. The stems were colored with Shabby Shutters.

The dies are from a Spellbinders collection: Marvelous Squares. They cut beautifully. The Splitcoast Product Focus team published a review on this line from Spellbinders last week, too. If you missed it,  you can find some common sense feedback and great projects using the Spellbinders Enhancing Elements here.

I accented the corners of the top layer with Liquid Pearls. A very easy way to dress it up.

I have a few more projects to share over the next few days. I think I ended up with about 18 or 19 cards for the week of challenges. I wish I would have gotten to all 42 challenges, but I don’t think 18 is too shabby considering a full work-load, two pre-teen girls who are so bored, bored, bored with the long summer days, a long weekend trip out of town with old friends and a Taylor Swift concert with above mentioned girls.

I’ll be back in a day or two. Thanks for looking!

Kneel

About two weeks ago, I was peeking at the new Sweet ‘n Sassy Stamps release for July, and I was so impressed with the floral silhouettes and sentiments in their new Celebrate Today set. I knew it would be perfect to pair with yesterday’s Dare to Get Dirty challenge hosted by Miss Kittie! I hope you can find some time to play with us! Lots of great inspirational challenges and prizes this week!

I have needed a few sympathy cards recently, so clean and simple (read: easy to put together) cards have helped me get things finished up and mailed. I keep reaching for my MFT Blueprints Die-namics to get that done. I really don’t have to think when I use those dies, just cut and layer. I like that.

My background was created using the Belleek Inspired technique. I found it so easy with a brayer and ink. I love the tone-on-tone look for classic simplicity.

I came home from CHA on Saturday afternoon to a broken hot water heater. Yay me! So, that means showers at the YMCA for a few days, a few loads of laundry that need to wait and little cooking. Did I mention my car is in the shop today? Or that it’s raining? I’m so glad it’s summer. Today, I think I’ll just hang out and make pretty things with paper!

I’ll be back tomorrow with another Dare to Get Dirty project. I’m getting a ton of card making done, and that always feels like a great accomplishment…whether my laundry is caught up or not!

Have a beautiful Monday!

  • Stamps: Celebrate Today – Sweet ‘n Sassy Stamps
  • Paper: Whip Cream & Kraft – MFT Stamps
  • Ink: Kraft – MFT & Vintage Cream PTI
  • Accessories: Blueprints 1 Dienamics – MFT, Dots Embossalicious folder – Crafter’s Companion and a brayer

God Opens Doors

It’s day 2 of the Splitcoaststampers LOVE FEST! This is my card for Sweet ‘n Sassy’s sketch challenge! I had a lot of fun with this one! Thank you, Korin!

I used the set New Beginnings from Sweet ‘n Sassy Stamps and the coordinating dies. I love this set because it’s versatile and easy to use. The sentiments are beautiful. I paired my images with paper from the Miss Caroline collection – My Mind’s Eye. I love the patterned papers that have embellishment and interest built into the corners – like these pretty flowers. Makes it so easy to use! Finally, I cut a few butterflies from vellum that was tinted with Old Paper Distress ink from Ranger, layered two of each together and stitched with my sewing machine.

Continue reading

Christmas Light

Good morning! Welcome to the 5th Birthday Blog Hop for my friends at Sweet ‘n Sassy Stamps! I remember getting to know Korin at Splitcoaststampers when she was just opening the store. Five years later, I have enjoyed working with her so much. Korin is truly a lady of grace and a joy to work with. I’m so happy she asked me to be hopping with Friends of Sweet ‘n Sassy today!

When I was laying out my project, I chose one of my favorite set/die combos from Sweet ‘n Sassy, Christmas Light. Look at the gorgeous detail on both the candle and the die. Love this!

My image is colored with Copic Marker – I love the brassy look of Y28. It’s not a color that I use a ton, but it sure is perfect for this image. I put a little glassy glaze over the top of my candle wax drips, and just a hint of Spica glitter pen over the flame.

My card is put together with cranberry paper from Core’dinations that has been embossed with an embossing folder and distressed just a touch with a sanding block, decorative oval die from Spellbinders and some scraps of lace that I found in a bag of cast-offs.

I hope you have time to visit our hoppers today. Korin has chosen 4 secret participant blogs where she’ll choose a random commenter to win a $15 gift certificate, so while you are browsing at the eye candy, leave the ladies some love. Comments must be made by midnight EST on Friday, November 30th. The winners will be announced on the SNSS Blog on Saturday, December 1st at 8am EST.

You can find the full hop line up HERE.

Let the stamping begin…

It’s Virtual Stamp Night at  Splitcoaststampers today! That means there are many fun opportunities to create quick and easy cards around a back-to-school theme.

I think VSN is a relaxing way to replenish your send stack of cards. You know what I mean by send stack? Please tell me that you have a send stack and an i can’t part with that stack. Tell me I’m not a bubble off.

So, I’m stamping today, and I am hosting a challenge! A quick, easy and super sparkly challenge!

Join me over there – anytime before Monday night!


Sweet & Sassy in Seattle

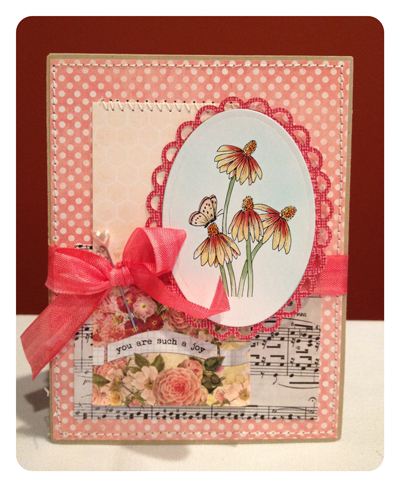
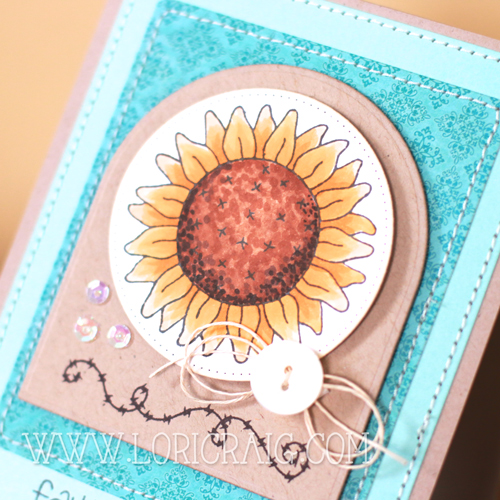
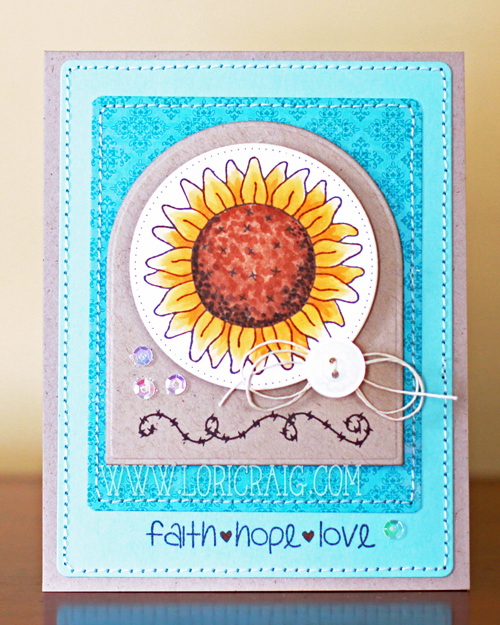
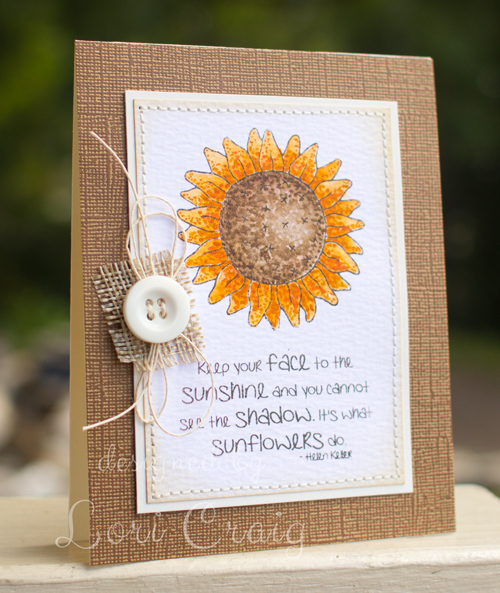
Looking through my pictures, working on getting back on track with Project Life, and I realize I have this Sweet n Sassy card to share with you. I had colored the Coneflowers and Butterfly image and made this card back in April when I met Miss Sherrie in Seattle for a weekend of Copic classes.

I taught the Standard certification one day, and Sherrie taught the Intermediate class the second day. We had some GREAT students in Seattle. While Sherrie gave them the razzle-dazzle on day 2, I took notes, colored and had the most amazing green tea/lemonade drink – recommended by one of the students. *IF* by chance you took that class, and you know what you told me to order that morning at Tully’s, please let me know. That lemonade/green tea thing was AWESOME!

Here is Sherrie getting one-on-one with the class participants. Since Sherrie does all of our Canada classes, this was a rare treat to see her state-side. She’s such an awesome teacher, and I am very fortunate that I got to work with her on this trip. Love that girl!

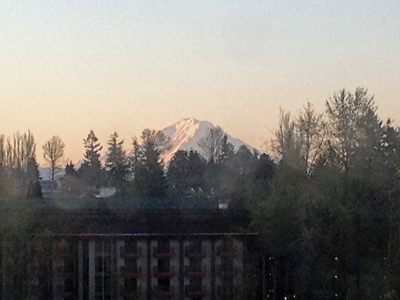
I have a few touristy shots to share with you. This was such a great short trip. Mount Ranier in the morning from our hotel room. What a majestic beauty!

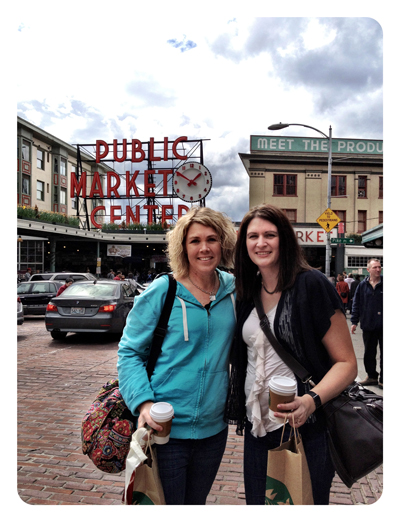
The first afternoon, we met at the hotel and then headed straight for Public Market Center. The plan was to walk around and take pretty pictures because I’m secretly stalking Sherrie’s photography prowess.

Beautiful fruits at the Public Market.

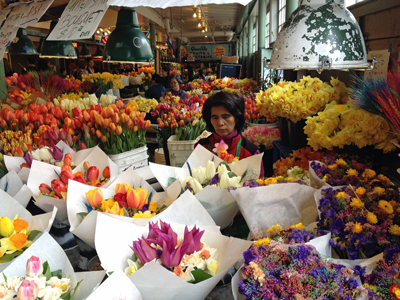
Remember this was April – tulips and daffodils galore. Such vibrant color. It was beautiful in there.

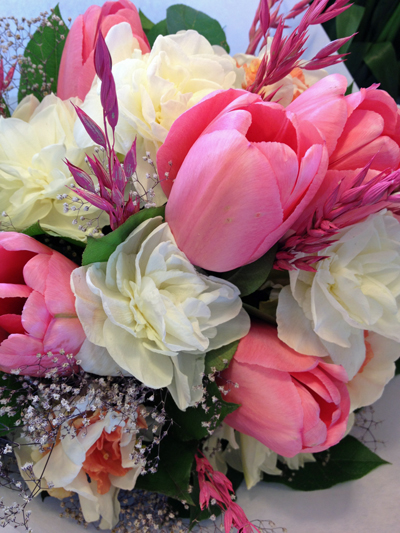
One of my favorite bouquets. All fresh flowers. I think this bouquet was $8 or $9. Steal!

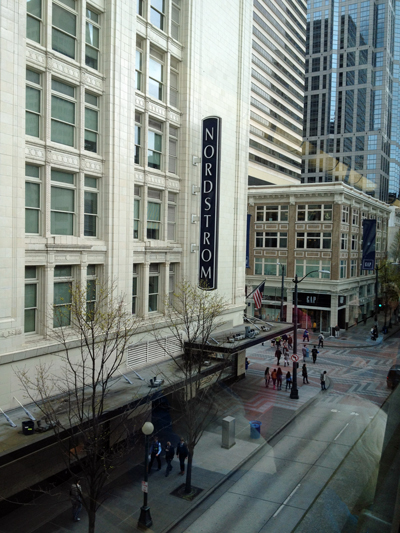
Because I had my priorities in line, a trip to the Mother Ship where I found a new pair of running shoes and some pressed powder.

We spent all day near the Public Market, and for dinner, my friend Susan Holton from Tsukineko met us on the water. On a recommendation from Sherrie’s brother-in-law, we ate at Elliott’s. Sherrie and I both ordered cheek meat and risotto. Delicious. Fabulous meal.

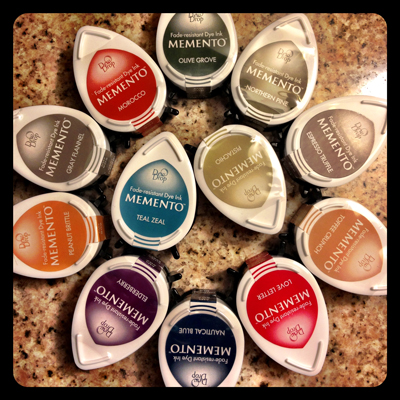
When we met Susan for dinner, the new Memento Dew Drops had just arrived, and she was so sweet to bring Sherrie and a little care package. Love the new colors!

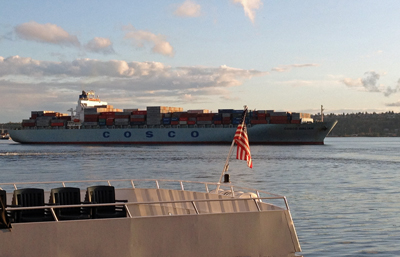
Here’s one more sight from our dinner view. Being the good midwestern girl that I am, this one mesmerized me. It seems like manufacturers are always talking about their goods being ‘in the container … on the ship’ or in the case of the Memento Dew Drops – they’ve just arrived. I knew the containers were basically pods that held the product. What I didn’t realize was the size and the amount on each ship. The containers are each about the size of a railroad car. And, on this ship, you can see them stacked 5 and 6 high just on the deck. This ship was loaded and headed out, and it will go all the way across the ocean with that cargo stacked like that. The sheer volume of goods on that one ship amazed me.

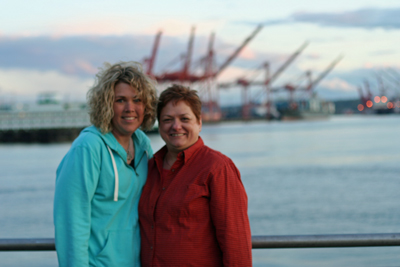
Here’s Sherrie and I after dinner..final shot of the night before the sunset.

{love} Seattle.