Category Archives: Clearsnap

To the Moon and Back

IMG_6235

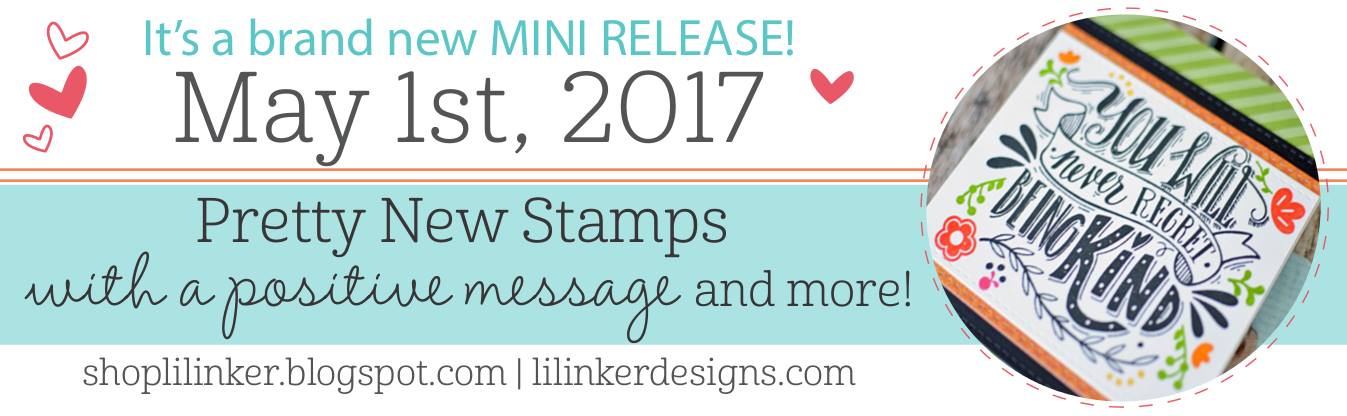
It’s been a long time since I’ve been so excited about colorful new stamping mediums, but this is the actual day! Our Splitcoaststampers Product Focus team was asked to work with a new ink line from Clearsnap called Dyestress Blendable Dye Inks.

I was a little bit nervous about working with the Dyestress Inks. Personally, I’ve never had good luck with other blendable inks — I drool over other stamper’s backgrounds and blending that I see on the internet, but no matter how hard I tried, I would always have foam or brush marks on my finished projects… I could never achieve the beautifully smooth blends.

Lori Craig MoonandBack Oct2018

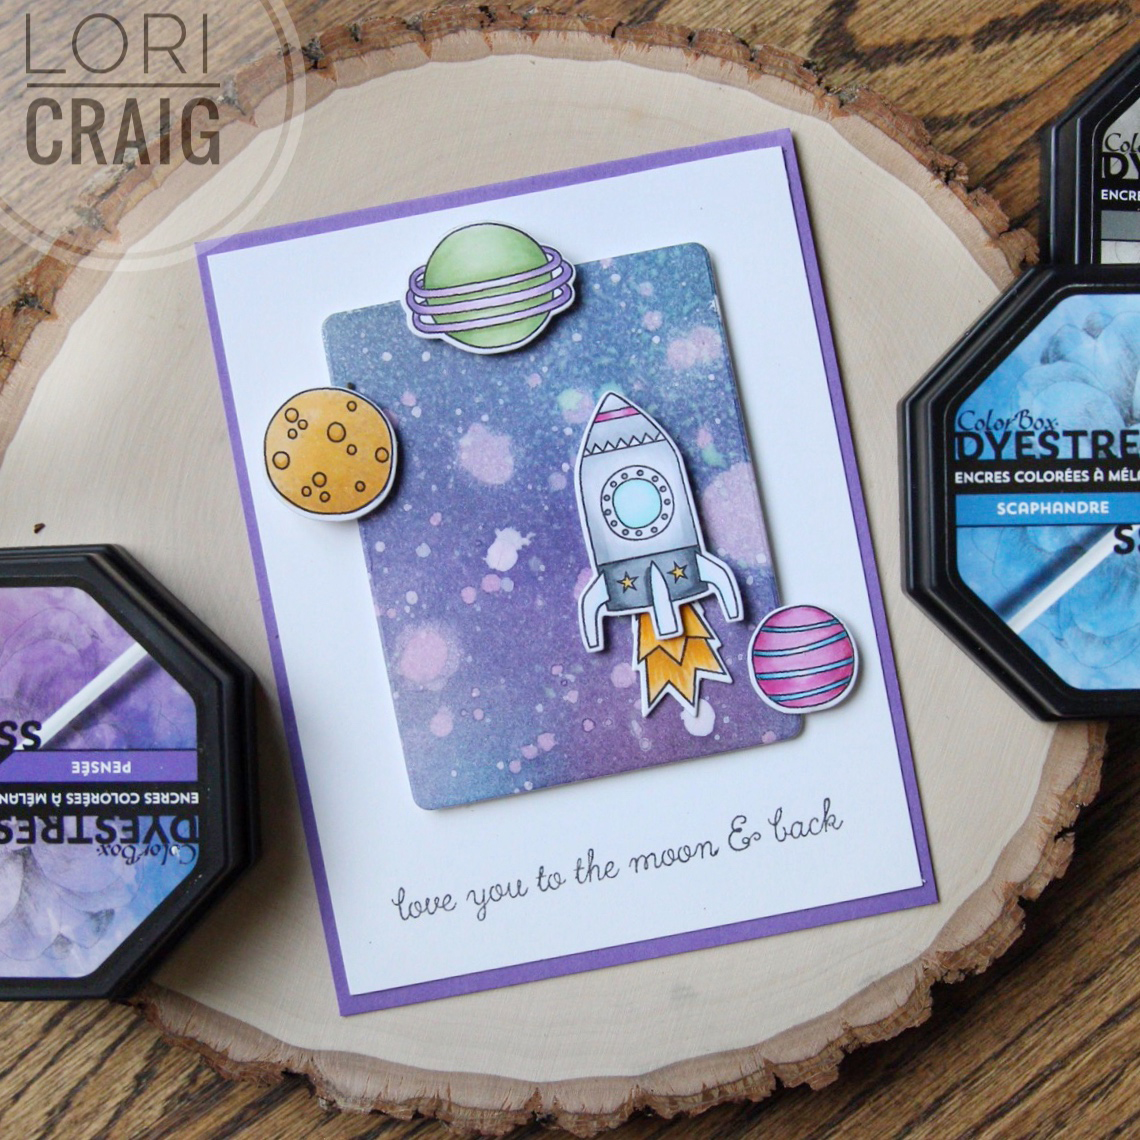
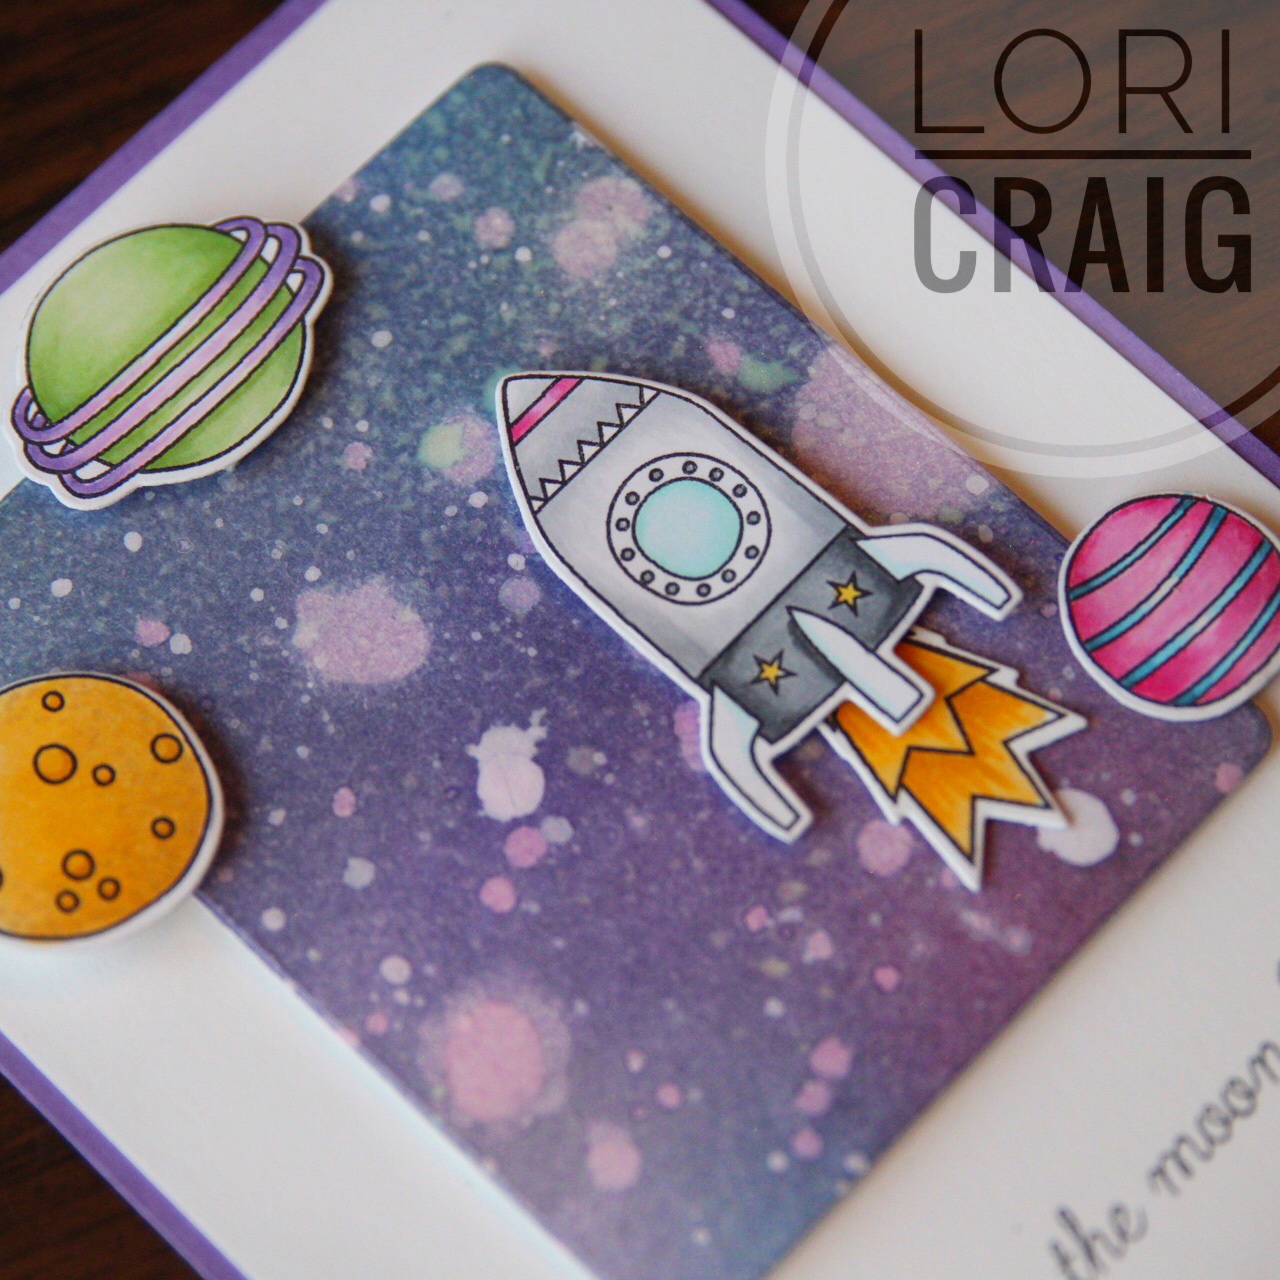
I could not believe how rich and smooth the colors blended for me on Bristol Smooth Cardstock to create this galaxy background. These inks stay wet long enough to dab with a papertowel or rag for texture, and they lift beautifully with drops of water that is spritzed and dripped and then picked up from the cardstock with a paper towel. When the cardstock was dry, I flicked drops of Ph Martin’s Hydrus Titanium White all over the blended inks. When that was dry, I shot the whole thing with a spritz of Imagine Crafts Sheer Shimmer Spritz that I borrowed from Kelly Lunceford at a retreat last weekend.

My images are from Reverse Confetti’s set Moon Men and color with Copic Markers. I do love how this turned out… I may even send this card! LOL

Lori Craig RidiculouslyHappy Oct2018

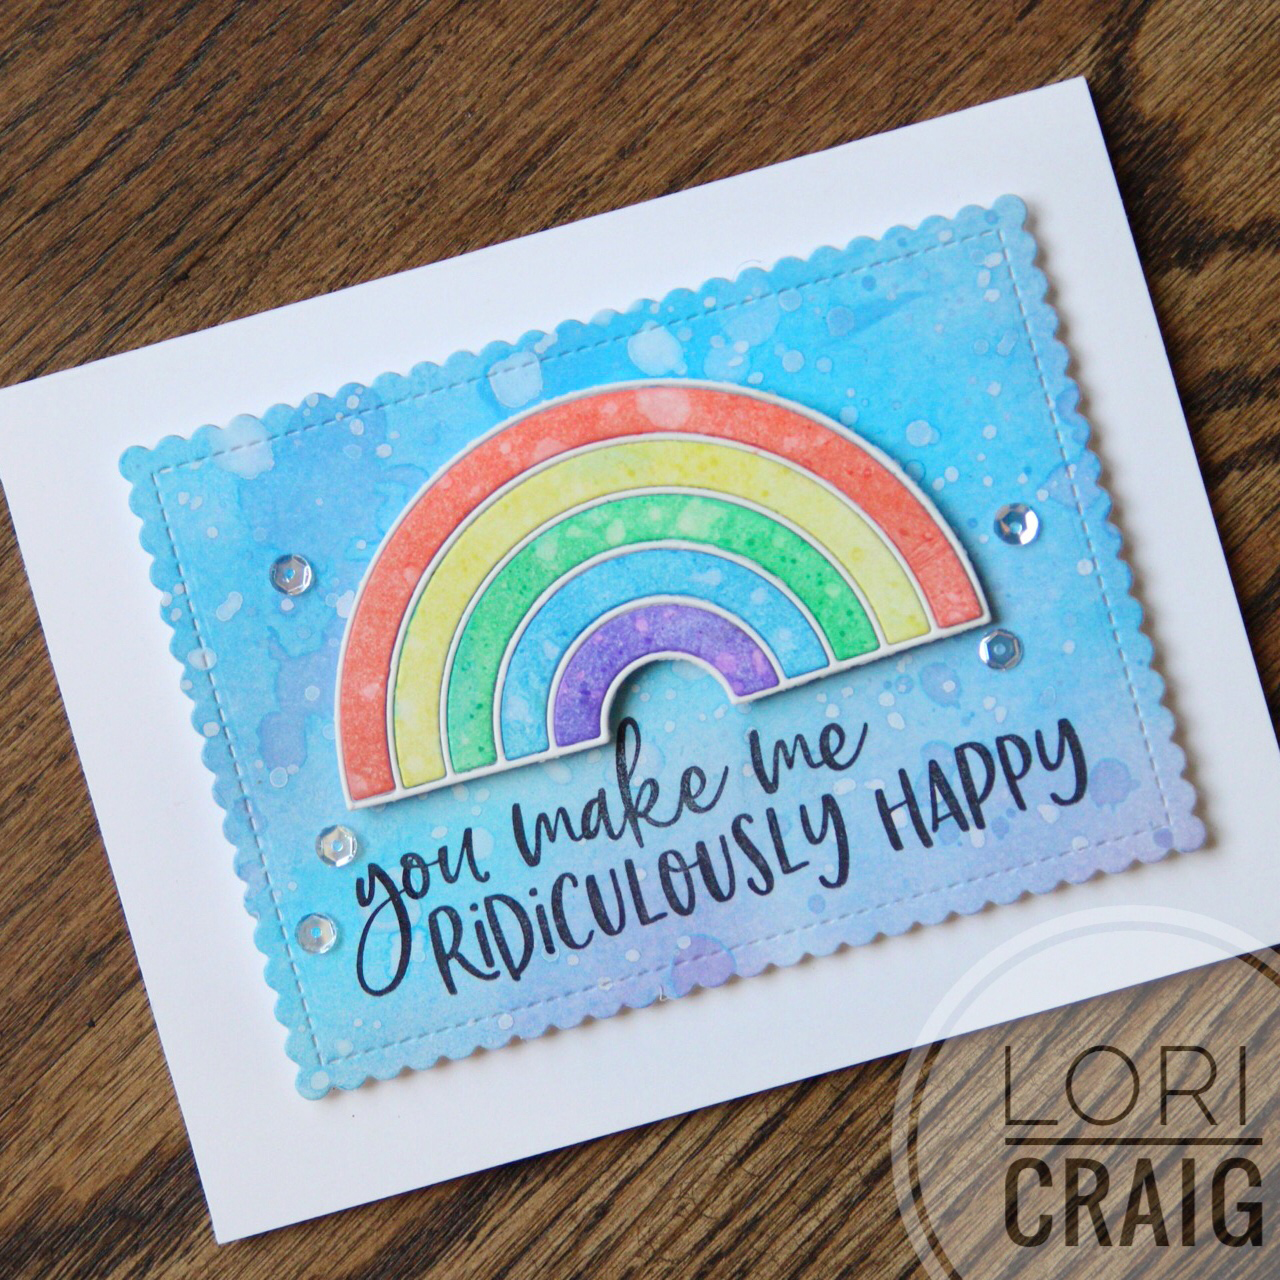
The second card I made for this project was a simpler blend of color and the same water lift of drops and spritz of water to absorb the color on Bristol Smooth Cardstock.(Yes, the paper makes a difference!) The colors of blendable ink I used for the background were Moonstone, and Heather, the rainbow was created with Salmon, Citronella, Shamrock, Scuba and Pansy.

IMG_6234

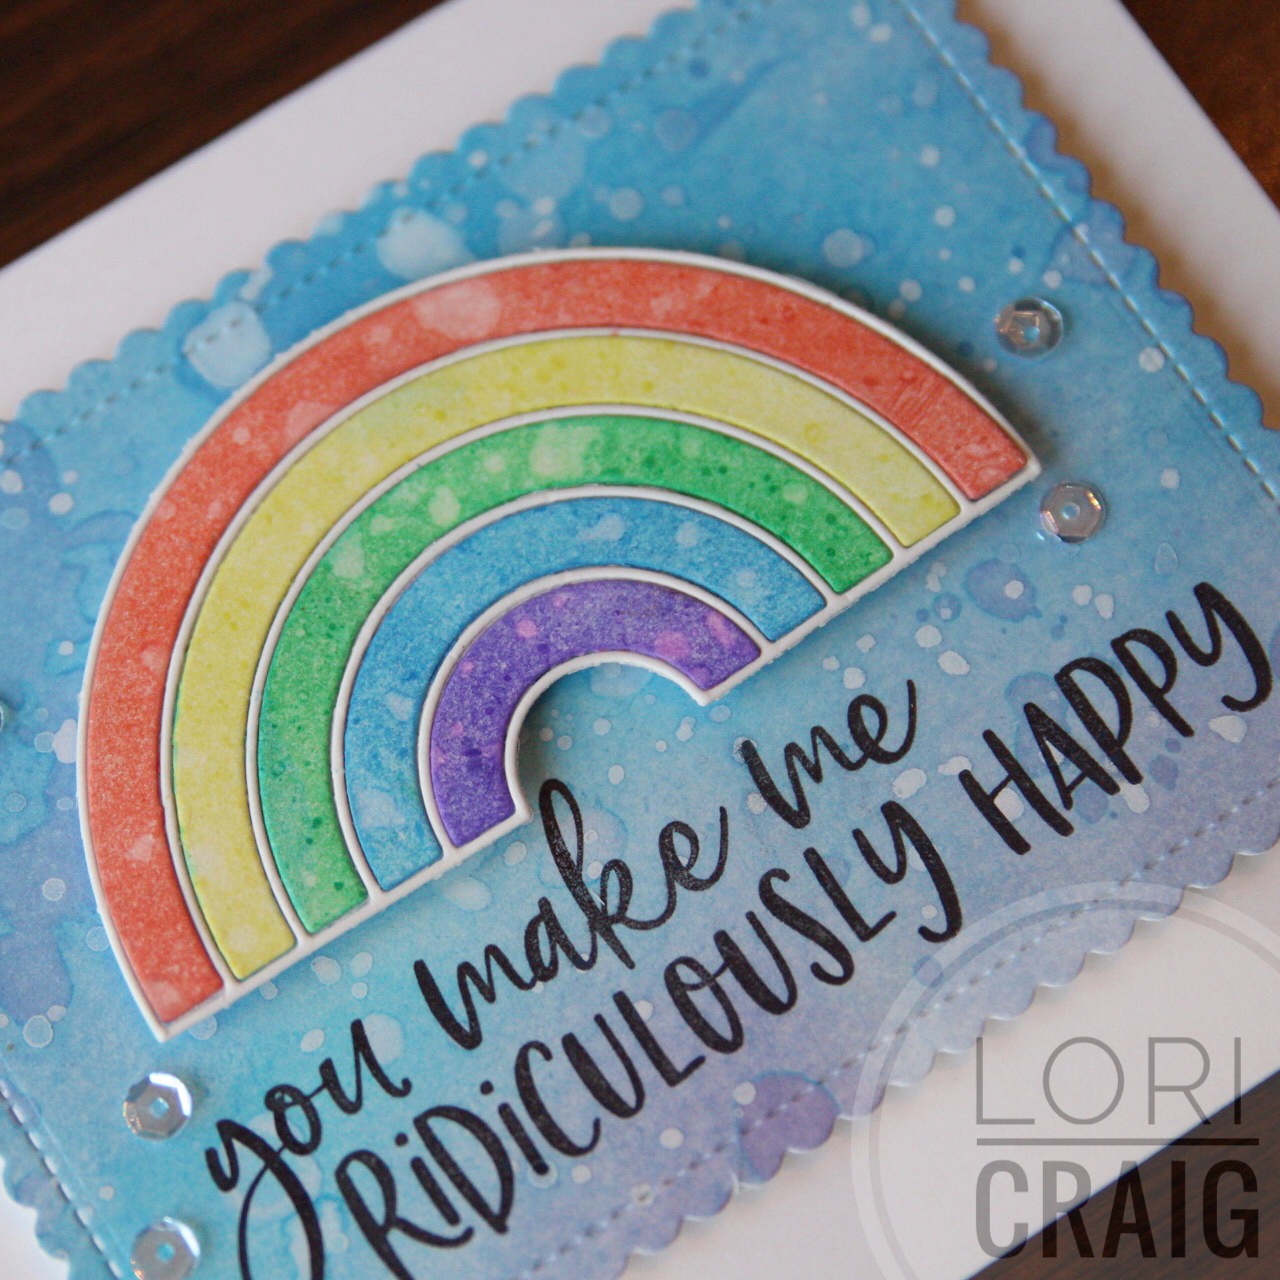
I used the Rainbow Die from Waffle Flower (so sweet and perfect!) and a sweet sentiment, Ridiculously Happy from Honey Bee Stamps.  Sequins from Studio Katia – super bling! Love.

IMG_6230

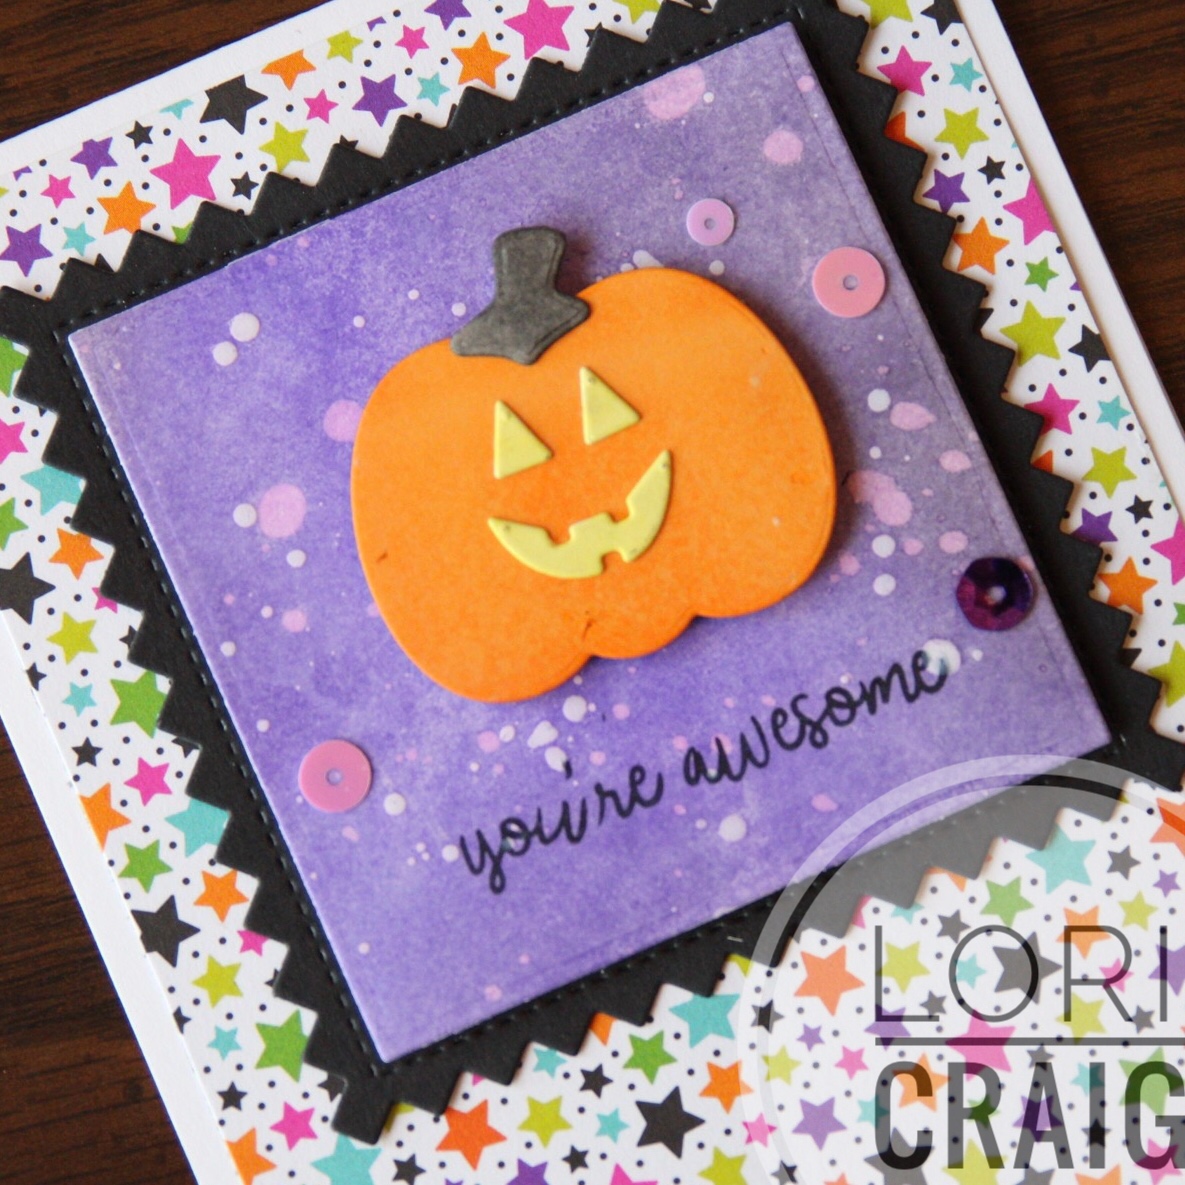
One more little Dyestress Ink project to share today… The colors I used were Heather and Pansy, again on Bristol Smooth Cardstock. The same water lifting technique and when the cardstock was dry, I flicked drops of Ph Martin’s Hydrus Titanium White all over the the purple background. Adorable Pick a Pumpkin die is from Newton’s Nook. Sequins from Studio Katia.

I love these inks, and so did the Product Focus review team. Take a look at their reviews here, and an inspiring project gallery here.

I stamped a lot over the weekend, and I’ll have projects to share over the next few days! Thanks for stopping by!

It’s Magic!

Lori Craig Magic Stamp 3

Stopping in today with a fun new-to-me product from Splitcoaststampers sponsor Clearsnap! It’s called the Magic Stamp, and apparently I have been under a stamping rock for 10 years because I’ve never known of this product before! Basically, it is the specially formulated blue foam block you see in photo above that lets you make your own stamp impressions from anything around you!

It’s March Madness, and in Kansas – where basketball was born (#truth) it’s always crazy – most often it’s crazy fun! SO, I grabbed the mini basketball off of my treasures’ shelf – it was signed by Perry Ellis that time my friend Karla and I got to meet several players at a Wichita meet-and-greet.  Fun to create with a real basketball texture.

You can see Lydia’s video and read the full Splitcoast Product Focus review HERE. And, keep scrolling for more of my sample cards. 🙂

Lori Craig Magic Stamp 2

For my next stamp, I picked up a wood-carved trivet that I’ve been painting. Look at the detail that the Magic Stamp picked up:

Lori Craig Magic Stamp 4

This was my first attempt with the Magic Stamp, and that was CRAZY impressive to me! For all of my samples, I’m using Impress Fresh Ink – my new found ink  love! After two recent retreats, I’ve ordered a whole slew of beautiful, rich ink pads.

Lori Craig Magic Stamp 1

Finally, I opened a jar of buttons and created this blue buttons card. I was super impressed (no pun intended) that the Magic Stamp was a breeze to clean up.

I had thought it would be full of inky-ink residue after an impression or two, but it basically cleans up beautifully and heats back to original form. Use it over and over and over.

The fun thing about this product is that the backgrounds you create are easy to form into cute and quick cards with a personal flair. I have a slew of sample impression samples on my desk waiting for card stock bases to love.

affiliate link used in this post – never at additional charge or fee to you.


You Make a Difference – yes… YOU!

make a difference lori craig 051617

I’ve revisited the old “trading card” concept lately because I’ve been mailing a lot of packages, trades, supplies and family stuff. And, it seemed like I wasn’t even taking time to scribble a note on a piece of paper to stuff into the box. <sigh> If someone was really lucky, they’d get a “hi – I love ya!” on a recycled post-it note. <not kidding>

A quick note on the back of a cute trading card lets me brighten a day much better than a recycled post-it, don’t you think?!  I’ve loved having a stash and using these!

My flowers and leaf are from the beautiful Bloom and Grow set from Verve. They were stamped with the Clearsnap Petal Point Pigment pads from Sunset collection. Love how they coordinate. Super quick and easy.

Clearsnap_PetalPoints_Photo1_300x300

If you are like me, you’ve stayed a way from pigments for a while because you were impatient for dry time or you didn’t want to emboss, but our Splitcoaststampers Product Focus review this week was a game changer. I loved the tips and tricks for working with them, because there really is nothing else like the rich, opaque look of a pretty pigment pad. Check it out HERE!


What are some papercrafting ideas you’ve recently re-visited and fallen in love with again? I’d love to know!


Lil’ Inker Designs Mini Release Blog Hop

FullSizeRender (9)

Earlier in April, I got a chance to hang out at the Whatever Craft House with my retreat girls, and we were spoiled by Laura Pryor with a sneak peak of  super cute positive message goodies from Lil Inker Designs! This sentiment is so poignant to me… and today, it’s MINI RELEASE day, and we are all sharing cards and prizes with you!

18121568_10154692470442499_6326554195844337696_o

Today my retreat friends are hopping and sharing our new stamps with a Lil Inkers Mini Release Blog Hop! You may have arrived here from my talent-oozing-friend, Heather… If you randomly landed here today, you can find the first post of this hop with Laura at the Lil’ Inker Store Blog.

never regret

smiles today


I loved these stamps for several reasons – 1) They are beautiful thoughts…  2) The layouts are great for full card front sentiments that stand alone. And, 3) The mimic the hand lettered look that is so popular right now!

FullSizeRender (4)


To create my card, I started with my Mini Misti and Petal Point Pigment Inks from Clearsnap! The tiny tip of each petal ink pad lets you easily ink precisely where you want on the stamp.


FullSizeRender (7)

I chose a monochromatic look with the reds to orange color run in my Petal Point pad, and the mini, removable ink pads were perfect for inking up small sections of the sentiment.

Love how vibrant these colors are!

After inking, I pressed once to the paper using the Mini MISTI. I embossed with detailed clear embossing powder and voila! So punchy!

FullSizeRender (9)

I finished my card off with Circle Confetti – a fun gift from Pretty Pink Posh! So fun!

To celebrate this fun mini release, Lil Inkers is giving away prizes!  Two winners for one sentiment stamp set and one winner to receive the cover plate and angel pets goodies! 

Be sure to visit and comment for each of the participants because the winners will be drawn from any of the participating blogs! All of the details can be found here.

Your next stop on this hop is the talented Chrissy Larson with several fun projects to share! 

Thanks for stopping by!