Category Archives: Spellbinders

Christmas Blessings

SpellbindersHolidayPF-close

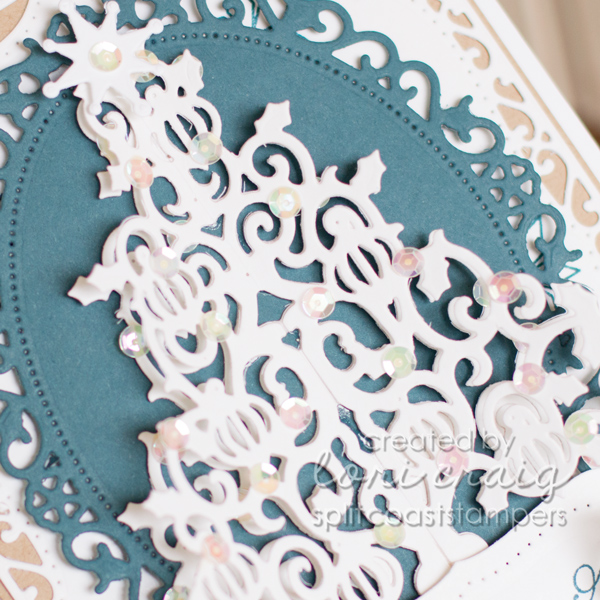
The end of the fussy cut… Love this 3D Christmas Tree die from Spellbinders. The the two seperate cutes of the tree will actually nest inside each other to create a stand up paper tree, or you can stack them (as I have here) for a beautiful dimensional card.

SpellbindersHolidayPF-600x600

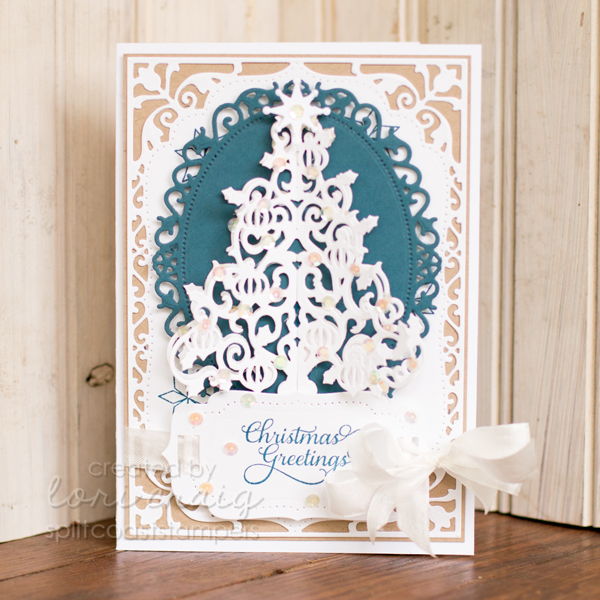
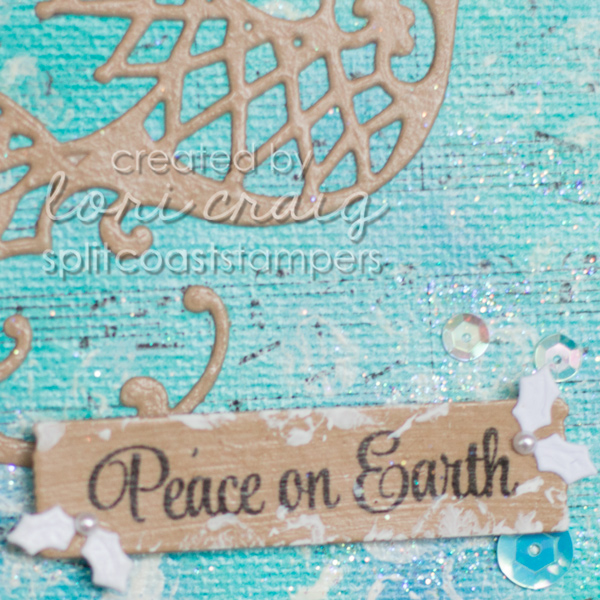
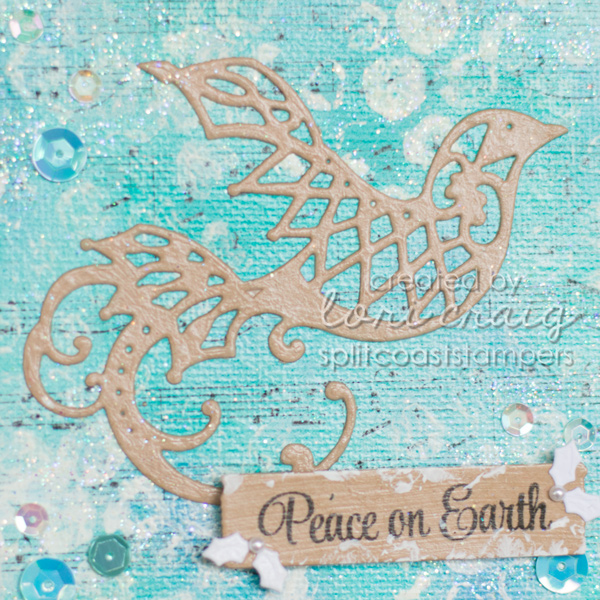
Just a tad bit of stamping here on the tag (Bright Spirits – Verve) and a combination of Spellbinders dies make quick work of this more elegant Christmas card. The dies I used were 3D Christmas Tree, 5×7 Elegant Labels 4 and Elegant Ovals. 

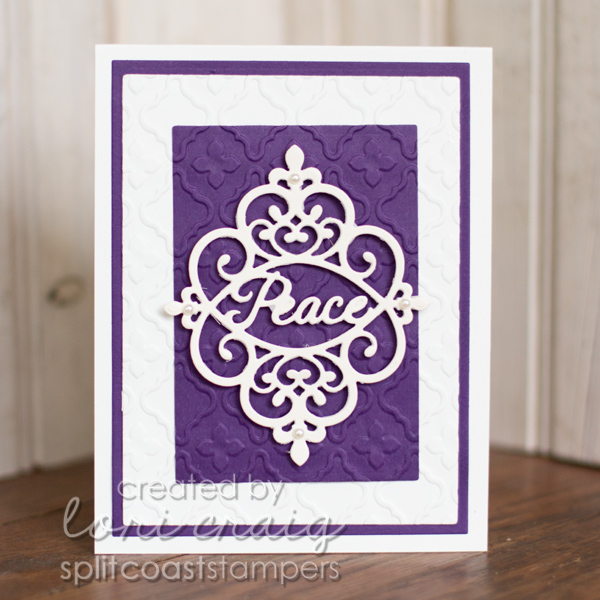
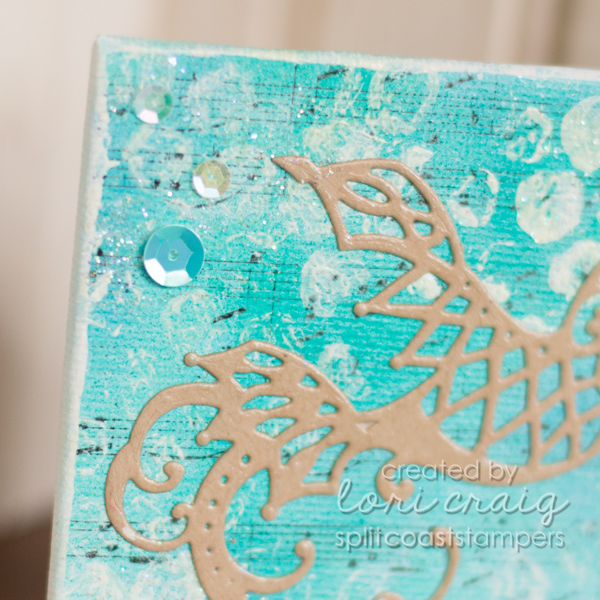
So many pretty dies in the Spellbinders winter holiday collection. Last week, we published a review of these dies at Splitcoast. You can read the review here and you can see all of the paper pretties that the Product Focus team made here in the gallery.

I’m at the annual Copic teaching team meeting this week. Looking forward to finalizing the plans for 2015 and prepping for some amazing classes!

Have a great day!

Peace


spellbinders holiday peace blog


Sharing a card this morning that I created for Joyce’s awesome Hope You Can Cling To challenge. The Spellbinders Peace Sentiment die and Regal M-Bossabilities folder made quick work of this one.

Still plenty of time for you to join us for Hope You Can Cling To challenges at Splitcoast. Great campaign for cancer awareness, sharing hope (either with cancer patients at MD Anderson or your own friends or family who are facing cancer now!) and many, many (over $5,000) prizes from amazing sponsors. Check it out.


HYCCT Blinking


Thanks for stopping by.

Peace on Earth Copic Canvas


HYCCT1404-blog

We published a Splitcoaststampers Product Focus piece for Spellbinders yesterday showcasing their beautiful collection of winter holiday dies. The team made some beautiful projects for the gallery, and I had time to make a few things, too. This was my favorite piece that I created for that project.

canvas-close1

This came together for me very quickly. The canvas was airbrushed with the Copic Airbrush system – which dries very fast, and then stamped with MFT Music Background stamp using Tsukineko Memento ink.

Then using a piece of bubble wrap, I stamped white gesso  and sprinkled with glitter while it was white. It dried in about 10-15 minutes.

canvas-close2

I stamped the sentiment on a piece of scrap paper and then applied mod podge over the top and brushed it with the wet edge of my gesso covered bubble wrap.

I die cut the Dove of Peace and applied it to the canvas with mod podge, as well.

canvas-close3

This worked well for Sabrina’s Hope You Can Cling To challenge, not a card, but I still hope the recipient will love it… I hope I can part with it. 🙂 As easy as it was to create, I think I’ll make a few more for Christmas gifts.

HYCCT Blinking

Thanks for stopping by!

Cutting with Detailed Dies

DetailedDies Newsletter Image 375x375

Someone left the backdoor at Splitcoaststampers unlocked, and I dropped a tutorial off over there with some tips and tricks for using intricate, detailed dies. I have always loved those fancy die shapes, but they certainly require a little finesse to get crisp, beautiful cuts. After a lot of research and practice, I think I’ve got it figured out. You can see the full tutorial here.

This card was made with my favorite wheat stamp, Wheat Sheaf from Serendipity Stamps. I colored the image with Copic Marker and then airbrushed the background with the Copic Air Compressor and beautiful Copic YR31. The dies I chose to showcase this image are Floral Ovals and Fancy Square dies from Spellbinders

Thanks so much for stopping by!

Celebra’tion Time

Celebrations-Photo3

Kissing summer goodbye over hear and gearing up for a very busy fall! Lots of great things are happening!

We published a Product Focus review at Splitcoaststampers for Spellbinders a few days ago. I loved how quick and easy it was to create a completely coordinated project with fun dies, stamps, papers and embellishments…all from the same product line!

I call this ‘Sweetened Sunflowers’. I used a very easy tutorial from Splitcoast for Cammie’s Triangle Treat Box. Literally done in 3 or 4 minutes. I think my favorite element is the matted chevron tag with the scalloped layer behind… the tags come with a mini impression plate. So fun!

SpellbindersCelebrations-Photo5

Fun pierced circle dies make clean and simple, super simple and eye-catching.

black-and-gold-because

One of the stamps and die combo sets (yes…stamp and die combo sets!) I used is called Just Because. I love cutting multiple layers of a flower die out of wax paper and layering for a lightweight 3D flower embellishment. The embossed circle layer was created with a coordinating embossing folder.

Celebrations_Photo3

Tags and word dies make quick work of a sweet-treat ‘thank you’ gift, too!

Check out our team’s full product review to see how all the elements of the new Spellbinders Celebra’tion line easily work together and gather a few fun tips and ideas.

I’ll be back tomorrow with more fun stuff! Have a beautiful Monday Tuesday…YAY for the short week!

Copic Airbrush Tutorial

Between Copic classes and all kinds of busy here on the home front, I put together a Copic Airbrush tutorial for Splitcoaststampers that was featured in yesterday’s newsletter.

You can find the full tutorial featuring embossing folders, alcohol markers and airbrush here. Don’t worry if you don’t have an airbrush system, you can get a similar look for this technique with daubers or ink mists (just make sure the alcohol ink that you choose is safe for air application – Copic is safe for airbrush and misting, but check your preferred brand to be sure!)

There is a really full Copic class schedule posted right now on the Copic site. A lot of opportunity for hands-on inky fun all around the country. Chances are good that someone on the teaching team is headed your way soon. All of the current classes are listed here. Full information and application info can be found here.

Thanks for stopping by. Hope the sun is starting to shine brighter (and hotter) in your corner of the country! Have a great day!

Choose Faith

I put this together for one of the Dare to Get Dirty challenges for our amazing Splitcoaststampers Fan Club members last week hosted by the one and only Lydia.  I think this met her criteria with several of the key components.

I used a new stamp set from Sweet ‘n Sassy Stamps for this project. The silhouette stems and pretty sentiments of this set, Celebrate Today, really spoke to me. I’ve used it several times in the last week alone.

My crinkled ribbon is actually seam binding. If you tie your ribbon and then mist it with a water mister, you can scrunch the ribbon very quickly and it will dry pretty fast, as well, while holding the crinkle shapes.

The poppies were colored with Distress Markers – direct to stamp. First, I colored them with Worn Lipstick and then tapped Fired Brick over the poppy blossoms. Easy. Peasy. I love that look. The stems were colored with Shabby Shutters.

The dies are from a Spellbinders collection: Marvelous Squares. They cut beautifully. The Splitcoast Product Focus team published a review on this line from Spellbinders last week, too. If you missed it,  you can find some common sense feedback and great projects using the Spellbinders Enhancing Elements here.

I accented the corners of the top layer with Liquid Pearls. A very easy way to dress it up.

I have a few more projects to share over the next few days. I think I ended up with about 18 or 19 cards for the week of challenges. I wish I would have gotten to all 42 challenges, but I don’t think 18 is too shabby considering a full work-load, two pre-teen girls who are so bored, bored, bored with the long summer days, a long weekend trip out of town with old friends and a Taylor Swift concert with above mentioned girls.

I’ll be back in a day or two. Thanks for looking!

Impressive

Still Daring to Get Dirty! Paper, stamps and ink have been flying in my office all week long! Along with that fun, the Product Focus review team at Splitcoast published a review for Enhancing Elements from Spellbinders today.

Look at that crisp impression made with the Enhancing Elements. The elements do not cut, they impress and deboss. You use them with your existing Nestabilities shapes (circle, square, oval and rectangle).

If you follow my work, you know that I love texture and dimension, but I’m not so big on bulk that requires extra postage when I actually mail a card. To that end, these impression dies are beautiful.

The sentiment is from a set that I picked up from Simon Says Stamp in the spring, Flower Friend. I fell in love with the font and the floral images that make up the set.

About a month ago, my friend Michele sent me some sequins. Razzle dazzle and no loose glitter! {love} I’ve been sticking them on all sorts of things. Very fun (and flat!)

Work up to my eyeballs today! The end of the month is always a good time! LOL. Not to mention, continuing Dare to Get Dirty challenges and a VSN Mini coming up this Friday night. We’re still getting caught up on laundry around here. <insert a big eyeroll> Lots going on.

See you tomorrow?