Category Archives: Splitcoast Stuff

Copic Airbrush Tutorial

Between Copic classes and all kinds of busy here on the home front, I put together a Copic Airbrush tutorial for Splitcoaststampers that was featured in yesterday’s newsletter.

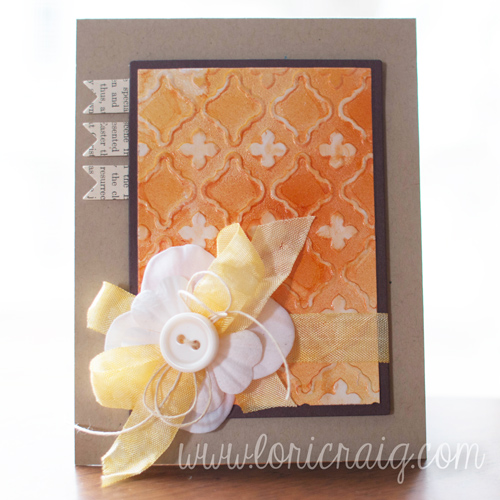
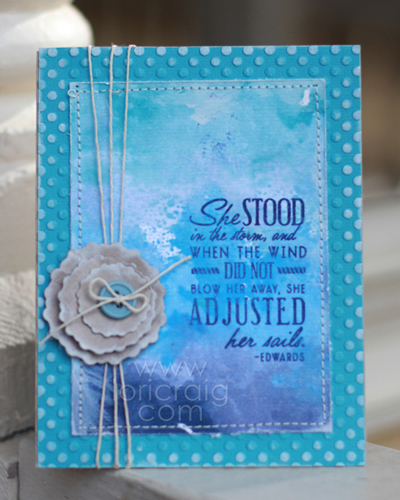
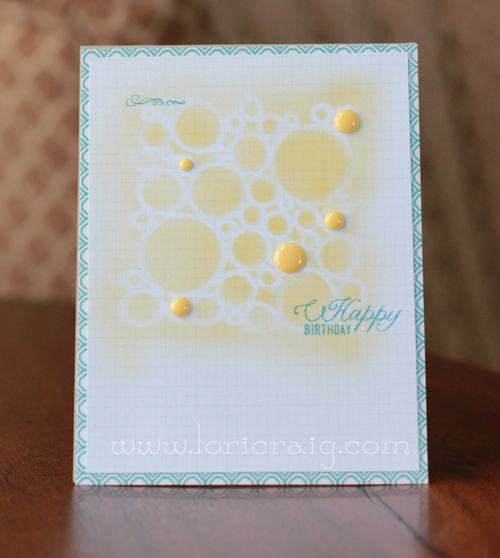
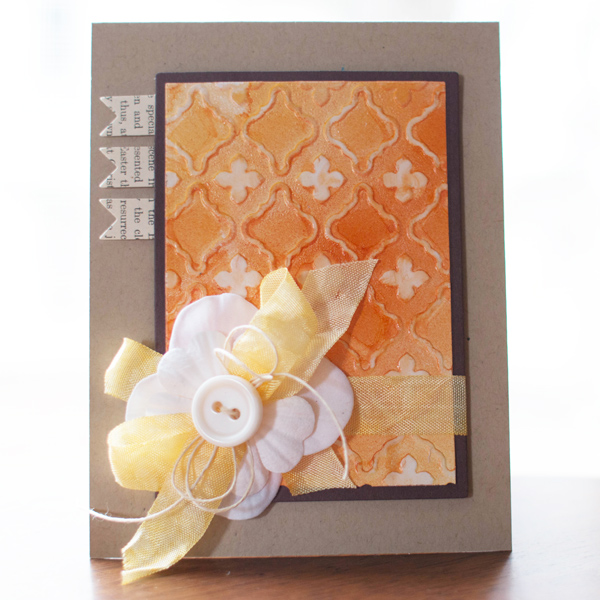
You can find the full tutorial featuring embossing folders, alcohol markers and airbrush here. Don’t worry if you don’t have an airbrush system, you can get a similar look for this technique with daubers or ink mists (just make sure the alcohol ink that you choose is safe for air application – Copic is safe for airbrush and misting, but check your preferred brand to be sure!)

There is a really full Copic class schedule posted right now on the Copic site. A lot of opportunity for hands-on inky fun all around the country. Chances are good that someone on the teaching team is headed your way soon. All of the current classes are listed here. Full information and application info can be found here.

Thanks for stopping by. Hope the sun is starting to shine brighter (and hotter) in your corner of the country! Have a great day!

Love Fest Challenges and Prizes at Splitcoast

We are celebrating our Member Companies this week at Splitcoast with 11 days of LOVE FEST fun challenges, chatter and prizes, hosted by our 10 fabulous Member Companies!

I made a card for today’s challenge hosted by The Cat’s Pajamas. Super cute challenge idea. Hope you find time to play along between now and March 3rd. There are a lot of $25 gift certificates up for grabs from your favorite places. (Wish I was eligible to win prizes!)

I used Build-a-Bingo from The Cat’s Pajamas and some various dies from Verve and MFT Stamps to put this together. The background was dry embossed on SnoCone cardstock from MFT and then brushed with a white ink pad. I love that quick and easy look.

I’ll be back – lots of fun challenges and several more cards to share this week!

Sewn Sunflowers

At Splitcoast, we get a lot of questions and comments about sewing on cardstock, and I do love to finish my cards off with stitching, using my Janome Sew Mini. I’ve had my machine for several years, and I use it quite a bit.

We featured a tutorial today on winding the bobbin, threading the machine, loading the bobbin and stitching on cardstock. You can find my tutorial and video here. Happy Stitching!

You’re a Classic!

I made this card for the “It’s a Cover Up!” Hope You Can Cling To challenge at Splitcoast! Had a lot of fun with my Taylored Expressions stamp of the month, Instant Love and the Joy Fold technique. The papers are from a Crate 6×6 pad that I had in my drawer.

Over $5,000 in prizes (see the list HERE!) are up for grabs during the Hope You Can Cling To campaign at Splitcoast – I’m not eligible to win… You might as well join us and give it a shot! There is a new challenge posted everyday during the month of October. Find the details HERE.

Be back tomorrow with another sample! Thanks for stopping by.

Go stamp something!

  • Stamps: Instant Love – Taylored Expressions
  • Ink: MFT Electric Red, MFT Gumdrop Green, MFT Kraft – My Favorite Things
  • Cardstock: Kraft and Crate Paper 6×6 paper pad
  • Accs: Take Note Frame die – Taylored Expressions and sequins

Painting Office Storage Tutorial

A few months ago we produced a Product Focus at Splitcoast for one of my favorite storage solution companies, Stamp-n-Storage. I have several of their pieces in my office, and I put together a little tutorial to show you how I’ve painted my wooden pieces to match my office decor. It’s very easy. Just pay attention to a few key details and exercise a little patience for drying time. You can see the full review here and the tutorial here.

I’m working on a longer post with a tour of my office since we are basically finished with our renovation work now. Maybe in the next few days I can finish that up.

Have a great day!

Flag Day!

It’s Flag Day! That means my grandpa, a proud WW2 veteran would have been 93 years old today.  Flag Day has always been special and always stirs up a lot of emotion for me. But, hopefully, the common thread for each of us is still ‘God Bless the USA’.

I created this card with the new Stars & Stripes stamp set and die from Taylored Expressions. I can’t believe how easy it was to ink up the blue & white star area separately from the stripes with the edge of an ink pad. I’ve been using the Clearsnap brand of ink pads (My Favorite Things, Clearsnap and Stephanie Barnard colors!)  with foam cushion lately, and I love them because I don’t have to swipe or press repeatedly to ink up my image.

The card was for part of the Crafter’s Companion Product Focus review we did at Splitcoast for the Embossalicious Folders. Easy accents, every time. I used the Swirl Corner embossing folder for this one.

Happy Flag Day, my friends.

God Bless the USA!


She Adjusted Her Sails

My busy travel schedule for the spring is over, and I’ve been stamping lately. Amazing, I know.

I sent this card to a good friend. The last few months she’s been trudging through unchartered waters as her oldest son has joined the Navy.

My friend is just as proud as can be of his decision (as are all of us who know and love him!) but, her momma-heart does ache for the changes that it’s brought to her family. I get teary for her myself, and I’m reminded of the sacrifices that many families and extended families make to serve our country.

She stood in the storm, and when the wind did not blow her away, she adjusted her sails. ~ Edwards

How I made my card: This week, I’ve been working on a Product Focus product review for Splitcoaststampers using Embossalicious Folders from our friends at Crafter’s Companion. This was a card that I made two weeks ago for the review. I really do love the embossing folders because they come in a 6″ x 6″ (and 8″ x 8″) format so I can emboss a full card front in one pass, and in either direction I want! Yes!

I used Petite Dots embossing folder on my background layer of Broken China Core’dinations Cardstock and then dabbed the dots with Picket Fence Distress Paint.

The blue watercolory background layer for the sentiment on this card was made with Chipped Sapphire, Broken China & Salty Ocean Distress Paints from Ranger. I dabbled each of the colors on a craft mat and misted with water. Then I drug a piece of watercolor paper through the muddled colors. It dried with such a vibrant, matte finish. Love working with those paints.

The stamped sentiment is from a new Verve Plain Jane (meaning it’s a one-stamp  set at a really, really nice price!) called Adjusted Sails. The floral pieces on the left were cut with the Floral Frenzy dies, also from Verve.

Be sure to check out our review, and if you like the look of the dry embossing,Crafter’s Companion is offering a 40% off coupon thru June 24th, 2013. Look at the right hand column of the linked review page for the details on that 40% discount.

Thanks for stopping by! My spring travels are over, and I won’t be such a stranger to my blog, I promise.

Studio Calico

I have long admired the Studio Calico Card Kit team’s work. Love the clean lines and fun embellishments that always seem to go together just so.

This month the Product Focus team at Splitcoast had the opportunity to review the Studio Calico Card Kits, and I was fortunate enough to make a few cards. I loved how quickly things came together. Speed is the name of the game for me to get cards created in order to send them.

This first card was a breeze with my Copic Airbrush system, one Y21 yellow Sketch marker and the included supplies. The circle mask from Huey’s came with my SC kit, as did the Teresa Collins Enamel Dots – I love those things!

I’m going to be making a lot more of these clean and simple cards. When I find a masculine design that’s easy to execute, I’ve got to ride the wave. 🙂

This second card was also really easy. I paired InstraFrame Dienamic (MFT Stamps) and the Designer Mini Tag dies (Taylored Expressions) with the kit paper for several and easy cards. This one made me think of Lydia with it’s little ‘kitten on the cloud’…

I loved the Studio Calico card kit. You can read the full review from all of the girls on the team HERE.

This month’s kit actually goes on sale today at noon EST for subscribers and Waiting List customers (people who join leading up the current month’s release). You can read about the Waiting List here, and if you want to try it out – there is a great coupon code and info on the right column of the actual Product Focus review – hurry though, the coupon is only good this week through 2/28/13.

We’re still out of school here today with winter blizzard number 2. Hopefully we’ll be back to *normal* tomorrow. Would someone please define *normal*.

Have a GREAT Wednesday!


Season of Giving

Thanks for hopping by this week. My COPIC giveaway post is HERE!

Welcome to the Seasons Givings Blog Hop!  This hop is going to be a little bit different, in the fact that every single person participating, is giving something away.  All you need to do is visit each blog and leave a comment.  Really, really easy.

Continue reading

Colored Glass

We’re still blitzing at Splitcoast!

Today it was my turn to share a quick holiday project, Colored Glass Votives. Seriously easy and inexpensive.  The tutorial uses just Mod Podge and waterbased re-inker, but there is an even simpler Copic variation listed at the end.  I used Christmas Ornaments stamp and die•namics set from MFT with some colored seam binding to dress up the top of my votive.  Voila!

Have a great weekend!