
It’s one of my favorite Splitcoast weeks, and I was thrilled to get into my studio for some much needed paper therapy last week to prep for DARE TO GET DIRTY challenges and events! Our sponsors have offered some amazing prizes for this special week, and I hope you’ll join us for fun!
I’m hosting a challenge, along with dozens of dirty girls to celebrate! If you are a Splitcoast Fan Club member, start HERE! If you are not a Fan Club member yet, start HERE.
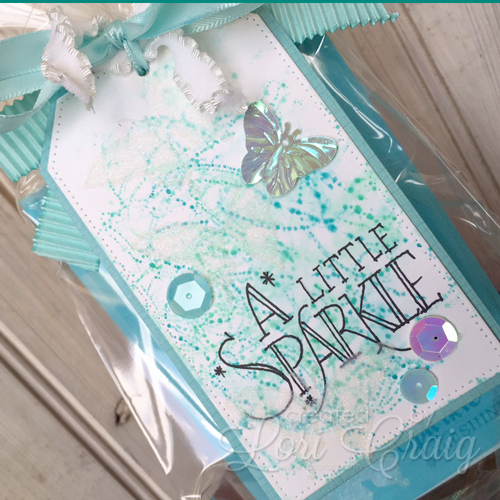
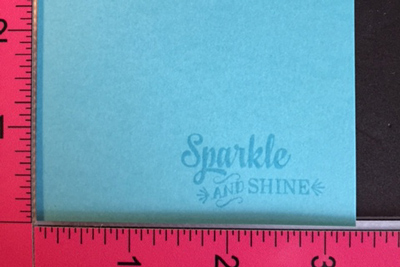
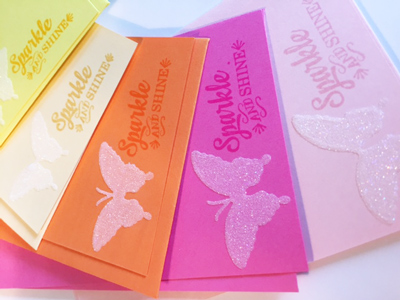
This little notecard set was a gift for one of my girlfriend’s birthday. It’s a rainbow set of “sparkle and shine” cards with a fun sentiment tag. I used a few different new-to-me tools for this project, so I thought I’d share a few details.
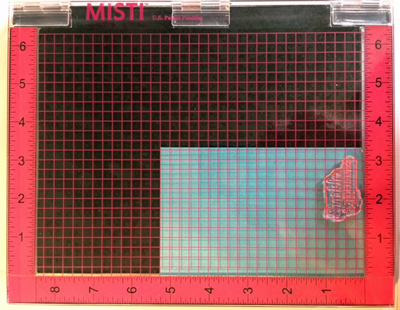
Because I was making a set of cards, I wanted the sentiment placement on each to be consistent, and I took the wrapping off of my new MISTI – stamp positioning tool. I’ve been a Stamp-a-ma-jig supporter forever, but I will say this thing is revolutionary.
It was so easy to line up this sweet sentiment from Verve’s Sparkly Dreams, stamp, swap to new piece of cardstock, re-stamp (I wiped ink between each impression to swap ink colors. EASY and accurate!) On two of the colors, I needed to re-ink for a deeper impression, and that was a breeze with no shadows.
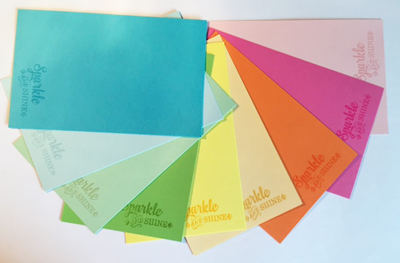
Nine notecards with a perfectly placed sentiment on each one in probably less than 9 minutes. Really impressed with the MISTI – no pun intended.
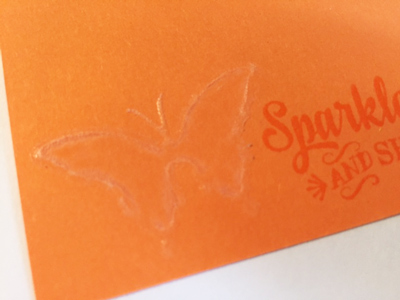
Next to the sweet sentiment, I wanted to add a little detail that would let the sentiment shine, but not be overly fussy. So I used XPress It Adhesive Sheets to cut accent pieces with Butterfly Dreams die from Verve. In my Vagabond, the dies cut the detailed wings and tentacles from the adhesive sheets perfectly. Peeling the protective layer (with the printing on the back) from the cut butterflies, I adhere them to my notecards and rub with my finger to make sure all of the edges stick to the card stock.
I peeled the protective layer from the adhesive sheets.
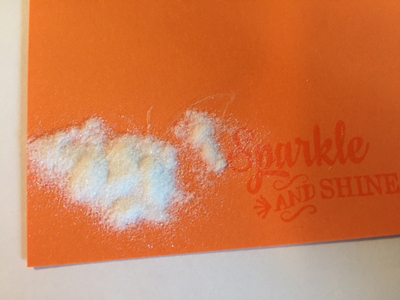
And sprinkle with glitter – I use Cool Diamond from Elizabeth Craft. It’s super smooth after application, and though I’m not coloring here, it’s very friendly and accepting to Copic color over the top. My favorite glitter.
Using a small scrap of clean copy paper, cover the glitter and press firmly to smash it into the adhesive sheet. Glide the paper around and press over the entire die cut of adhesive to make sure you ‘catch’ glitter in all of the sticky spots.
Look how crisp the adhesive sheet’s retention of the fine glitter is! Love this look for a easy WOW! That’s it.. my notecards were done, and moving on to the gift tag!
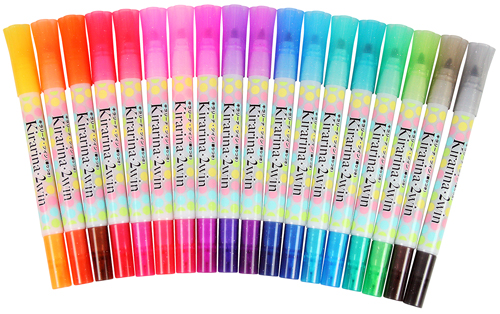
I’ve been playing with the Kirarina 2win Markers … there are 18 water based pens, double tipped with a different color and nib size on each pen for 36 different colors.
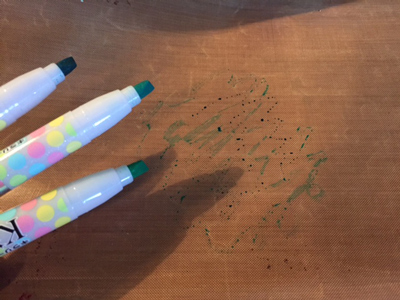
Copic introduced these markers at the CHA winter show last January… Here I used a combination of blues and greens scribbled on a kraft mat.
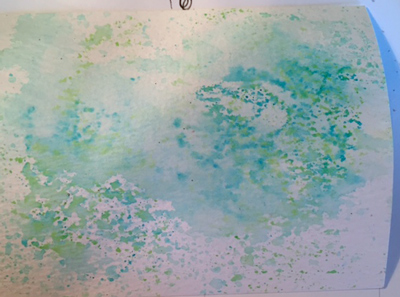
I dipped a piece of water color cardstock into the splotchy ink once, misted the sheet with water and dipped it again. (Watercolor paper or cardstock has a tendency to roll when wet. Just hit it with your heat gun and it will flatten back out as it dries.)
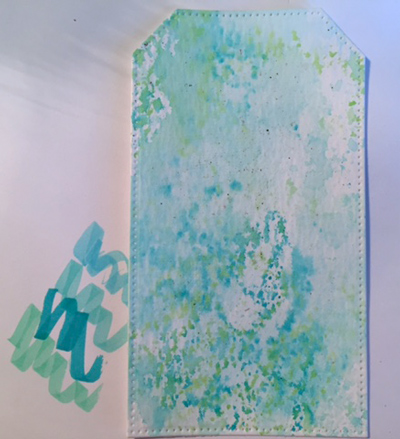
I ran that piece of cardstock through my Vagabond with a Pierced Traditional Tag Stax dienamic from MFT.
I added a freehand-lettered sentiment – a hobby I’ve been practicing by mimicking favored styles I find on Pinterest. It’s this kind of confidence booster that will give you the courage to try your own hand.
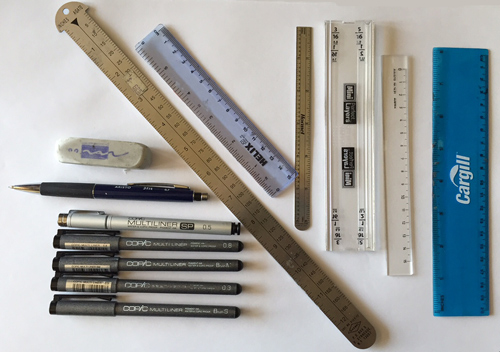
These are a few of the tools I keep in my doodling pouch… a collection of Multiliner pens – with different tip widths and rulers – Metal rulers are my favorite for crisp edges – the long one has been with me since my journalism classes in college … with a great mechanical pencil and white polymer eraser… you can undo a multitude of sins with a good eraser!
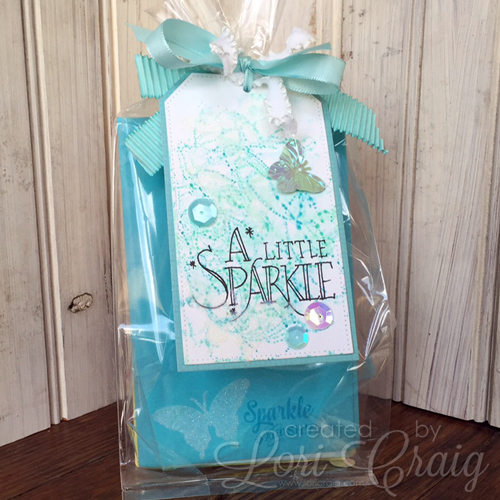
Finished up with some sequins, ribbon bits and a cello bag, it honestly took me longer to type this blog post than to craft my friend’s gift… You gotta love that!
Make sure you join us for Dare to Get Dirty. We’d love to see you strut your stuff this week with our designers! All of the initial details are HERE.
Back soon! Have a GREAT day!

